TABLE OF CONTENTS
- Creating Employee Accounts
- Modifying Employee Accounts
- Editing Employee Clock In/Out Times
- Editing Employee Break Times
- Reprinting the Employee End-Shift Report
- Additional Resources and Help!
Disclaimer

Please note that these accounts are used for employees to access the EZ Dine Application for daily work functions.

These accounts will not have the ability to modify settings within the EZ Dine Studio.  If the employees are needing to have the ability to perform edits to the Studio Dashboard, Please use the following article to make an additional Ez Dine Studio user account for the employee: Creating Studio Accounts
Creating Employee Accounts
- Click on Employee from the EMPLOYEE section
Click on the Add Employee + button to create the employee 
- Required contact information will be first name and passcode. All other contact information is optional
- Passcode
- This is the employee's login for use with clock in, clock out, and if provided access to use the device
- Store selector is used to assign this employee to your locations
- Please note that the passcode must be unique and pass the following three criteria
- Must be a 4 digit number
- Cannot be in chronological order ie. 1234
- Cannot be repeated digits ie. 1111
- Must be a 4 digit number
- Task
- Click on Select to open the Option Selector
- Select the task(s) for the employee and save
- Passcode
- Click Save
Modifying Employee Accounts
- Click the Employee tab from the EMPLOYEE section
- In the Employee screen you will have 3 options to modify your account
- You will be prohibited from deleting employee accounts while still clocked in

Deleting of the account 
Edit the settings of the employee 
Edit Time Sheet
Editing Employee Clock In/Out Times
- Click the Employee tab from the EMPLOYEE section
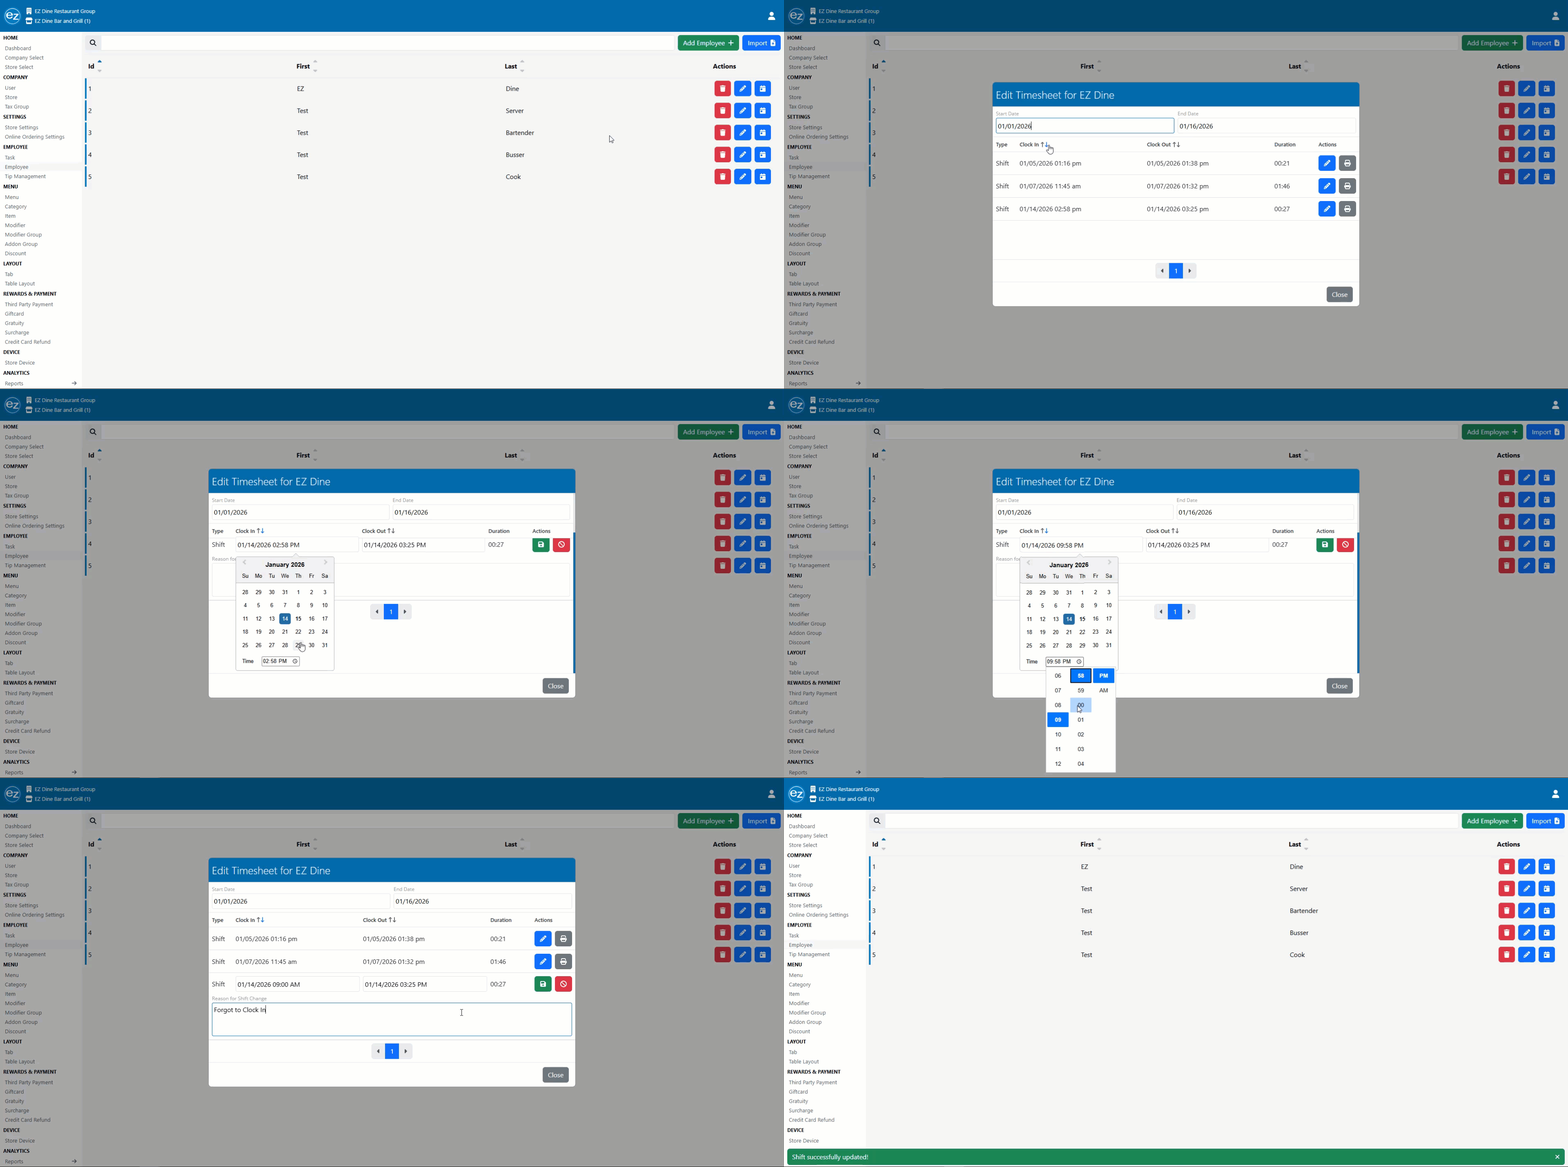
- Select the blue calendar icon and enter the start and end date range
- Clock in and clock out dates will be displayed from the earliest to latest date within the date range
- Dates and times can be sorted by pressing the up and down arrows positioned at the top of the clock in and out columns
- Select the blue edit pencil icon next to the shift that needs edited
- Update the date and times as needed. Enter a shift change reason and press the green save icon to complete the changes
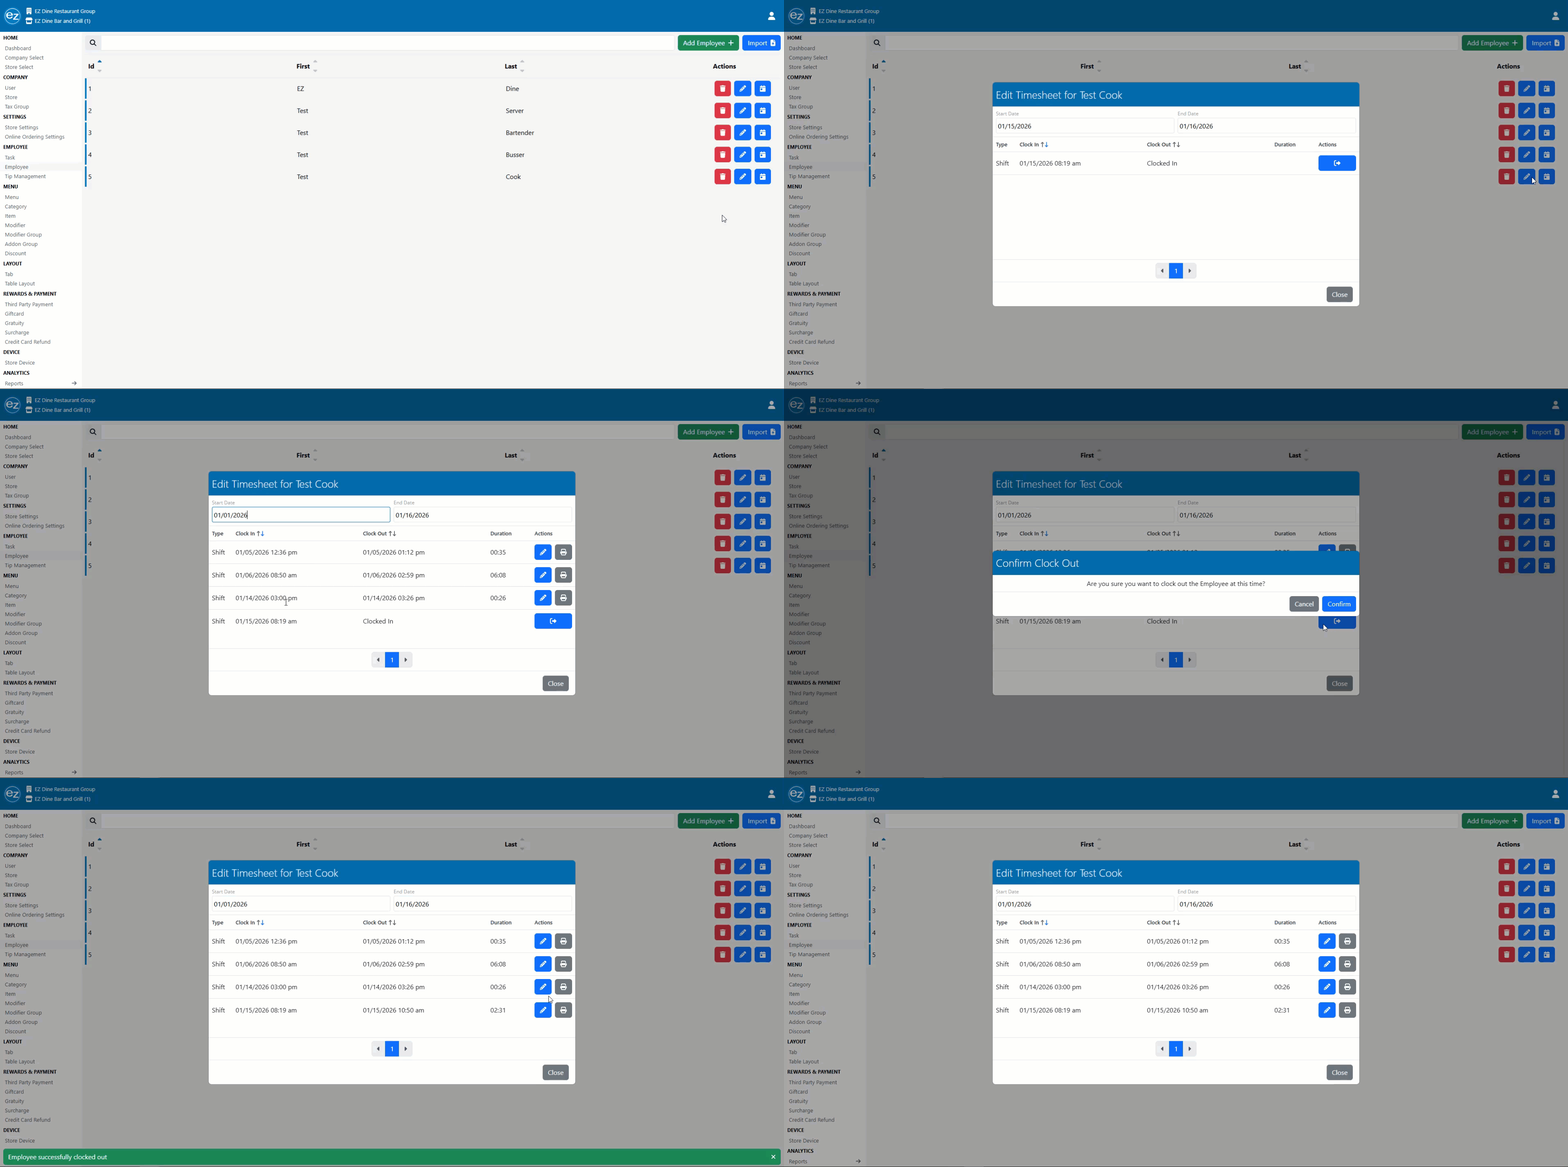
- Any employees currently clocked in on the EZ Dine App will display their open shift
- For instances were the employee forgot to clock out directly from the EZ Dine App. You will have the option to manually force clock out that open shift
- Select the blue clock out icon listed inside the clock out time field
- Confirm the force clock out
- Once confirmed a force clock out update message will be sent to the EZ Dine App. Details on the EZ Dine App clock out message can be found here: Force Clock Out Message
- The employee clocked in active status will update automatically on the dashboard page
- The date and time the force clock out is performed will be used as the default clock out date and time. Editing the date and time can be done by following the same process outlined in steps four and five
- All timesheet reports data will be recalculated automatically reflecting the new timesheet information
Edit Times
Force Clock Out
Editing Employee Break Times
- Click the Employee tab from the EMPLOYEE section
- Select the blue calendar icon and enter the start and end date range
- The break in and out time will be listed below the related shifts clock in and out time
- Press the blue edit pencil icon next to the break that needs edited
- Update the time as needed. Enter a break change reason and tap the green save icon to complete the changes
- All timesheet reports data will be recalculated automatically reflecting the new timesheet information
Reprinting the Employee End-Shift Report
- Click the Employee tab from the EMPLOYEE section
- Select the blue calendar icon and enter the start and end date range
- Next to each shift you will see a print icon located to the right of the edit and date option
- Press the print icon and the end-shift report will be displayed
Additional Resources and Help!
Still have questions? Please contact us any time at support@ezsoftpos.com.
NOTE: If emailing, please include your business name in the subject line of the email
and provide your preferred contact information for the best response time.
Visit our help center Help Center for more guides and tutorials


