
TABLE OF CONTENTS
Step 1: Message Center
All employees with device access can view broadcasted messages. Creating new messages and syncing EZ Dine Studio Cloud updates requires manager level permissions
- The Message Center panel on the main Orders tab allows staff and management to view internal communications, track low-inventory items, and sync Cloud configuration updates across active devices
- Update Alerts: When new EZ Dine Studio settings are published, a red caution icon appears on the Message Center tab
- Syncing Cloud Updates: Tap the Message Center to expand the side panel and view a summary of the Studio changes
- Tap the green Tap to download updates text to initiate the sync
- Once finished, a red "Settings synced successfully" status displays at the bottom, and the caution icon clears. Note: Devices sync Cloud updates independently; updating one device will not automatically sync secondary devices on the network
- Creating a Message: Tap the blue + Add New icon in the Message Center header, enter a Title Header and Message Text, then tap Save. Newly created messages displays at the top of the list
- Editing or Removing Messages: Tap any message body text in the list to open the Edit Message window. Modify the title or text as needed, or tap Remove and confirm the prompt to delete the message
- Printing Messages: Tap the Print icon to the right of any messages header to print a physical copy to the local receipt printer
- Item Counts Monitoring: Menu items assigned active inventory countdowns display directly within the Message Center list, showing the item name and remaining stock
- Configuration: To enable live inventory reporting in the Message Center, toggle Display Items with Low Availability to ON within the Item Availability management screen
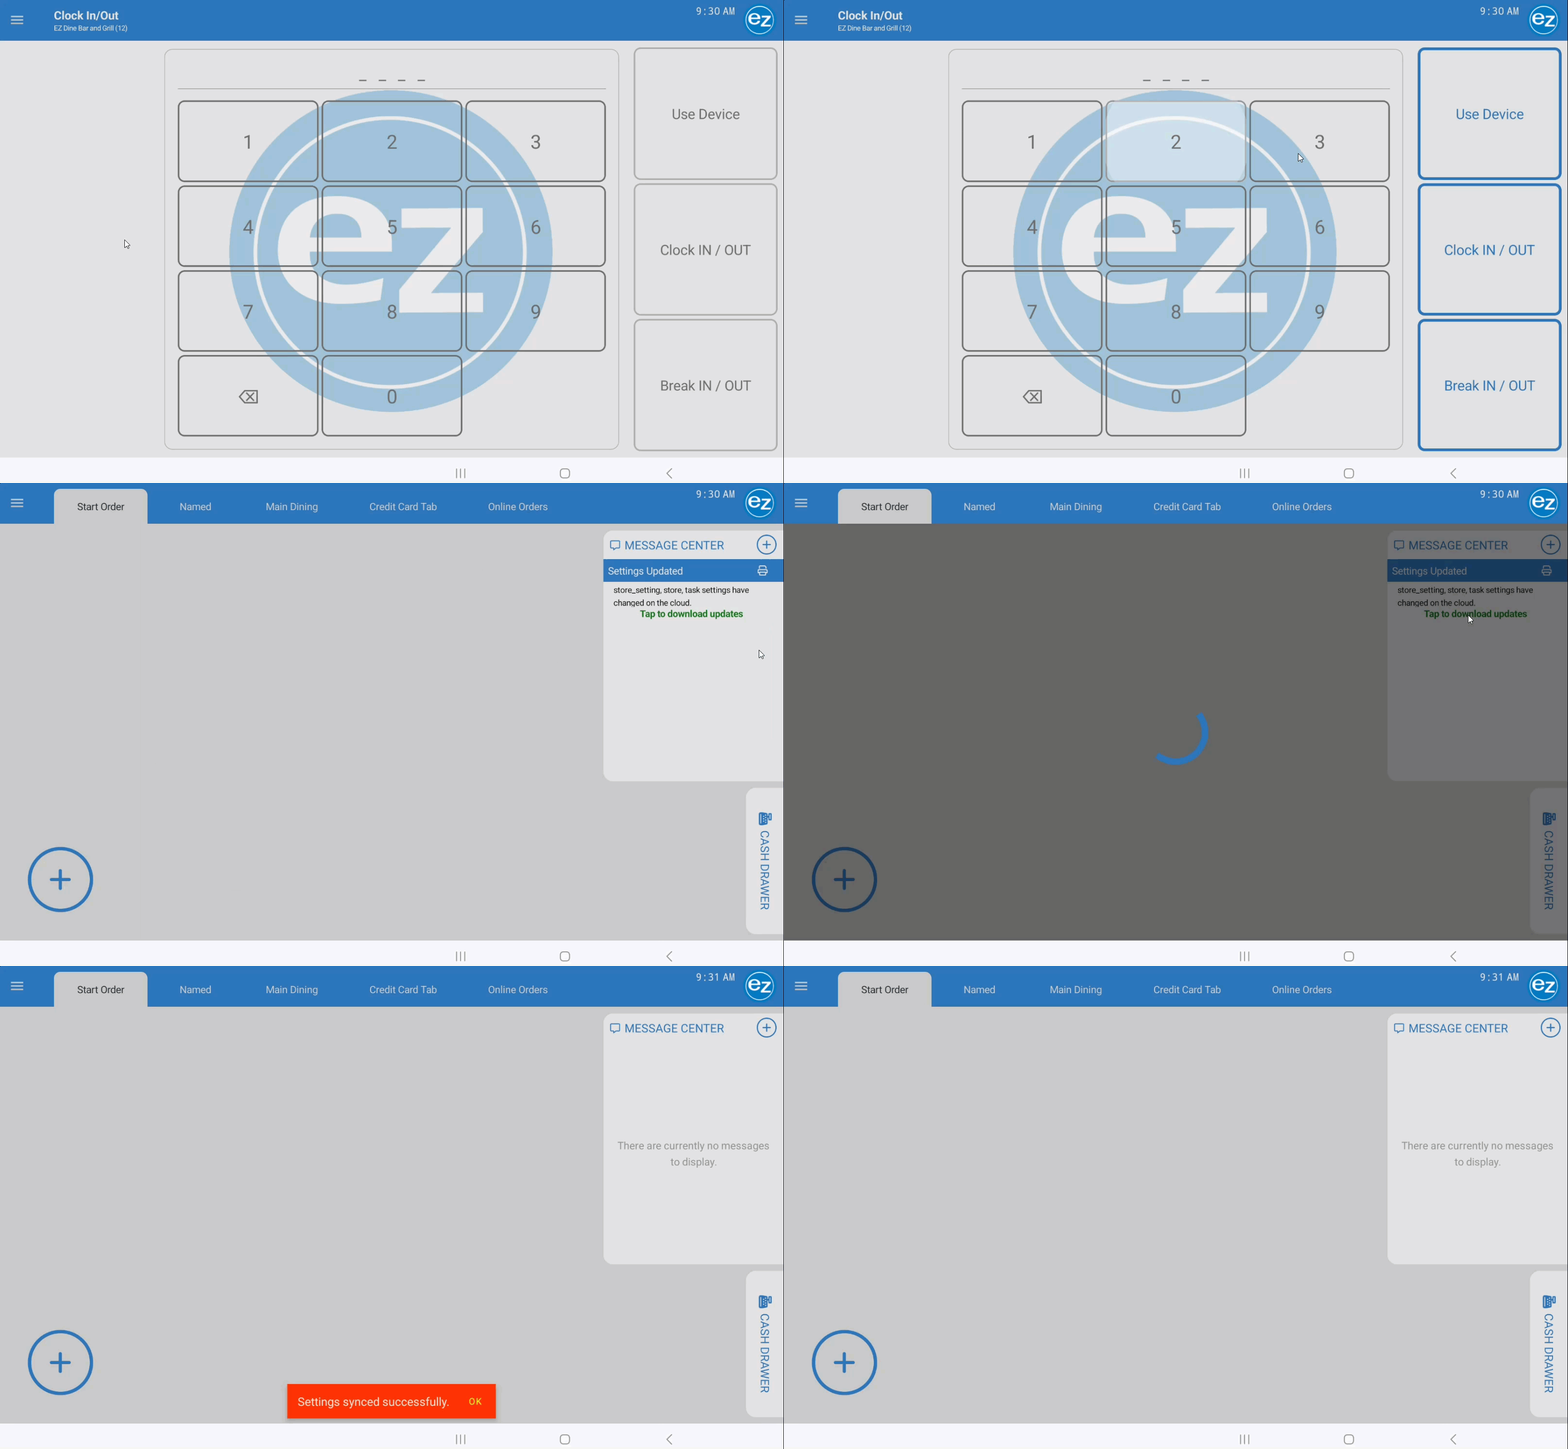
Cloud Settings Sync
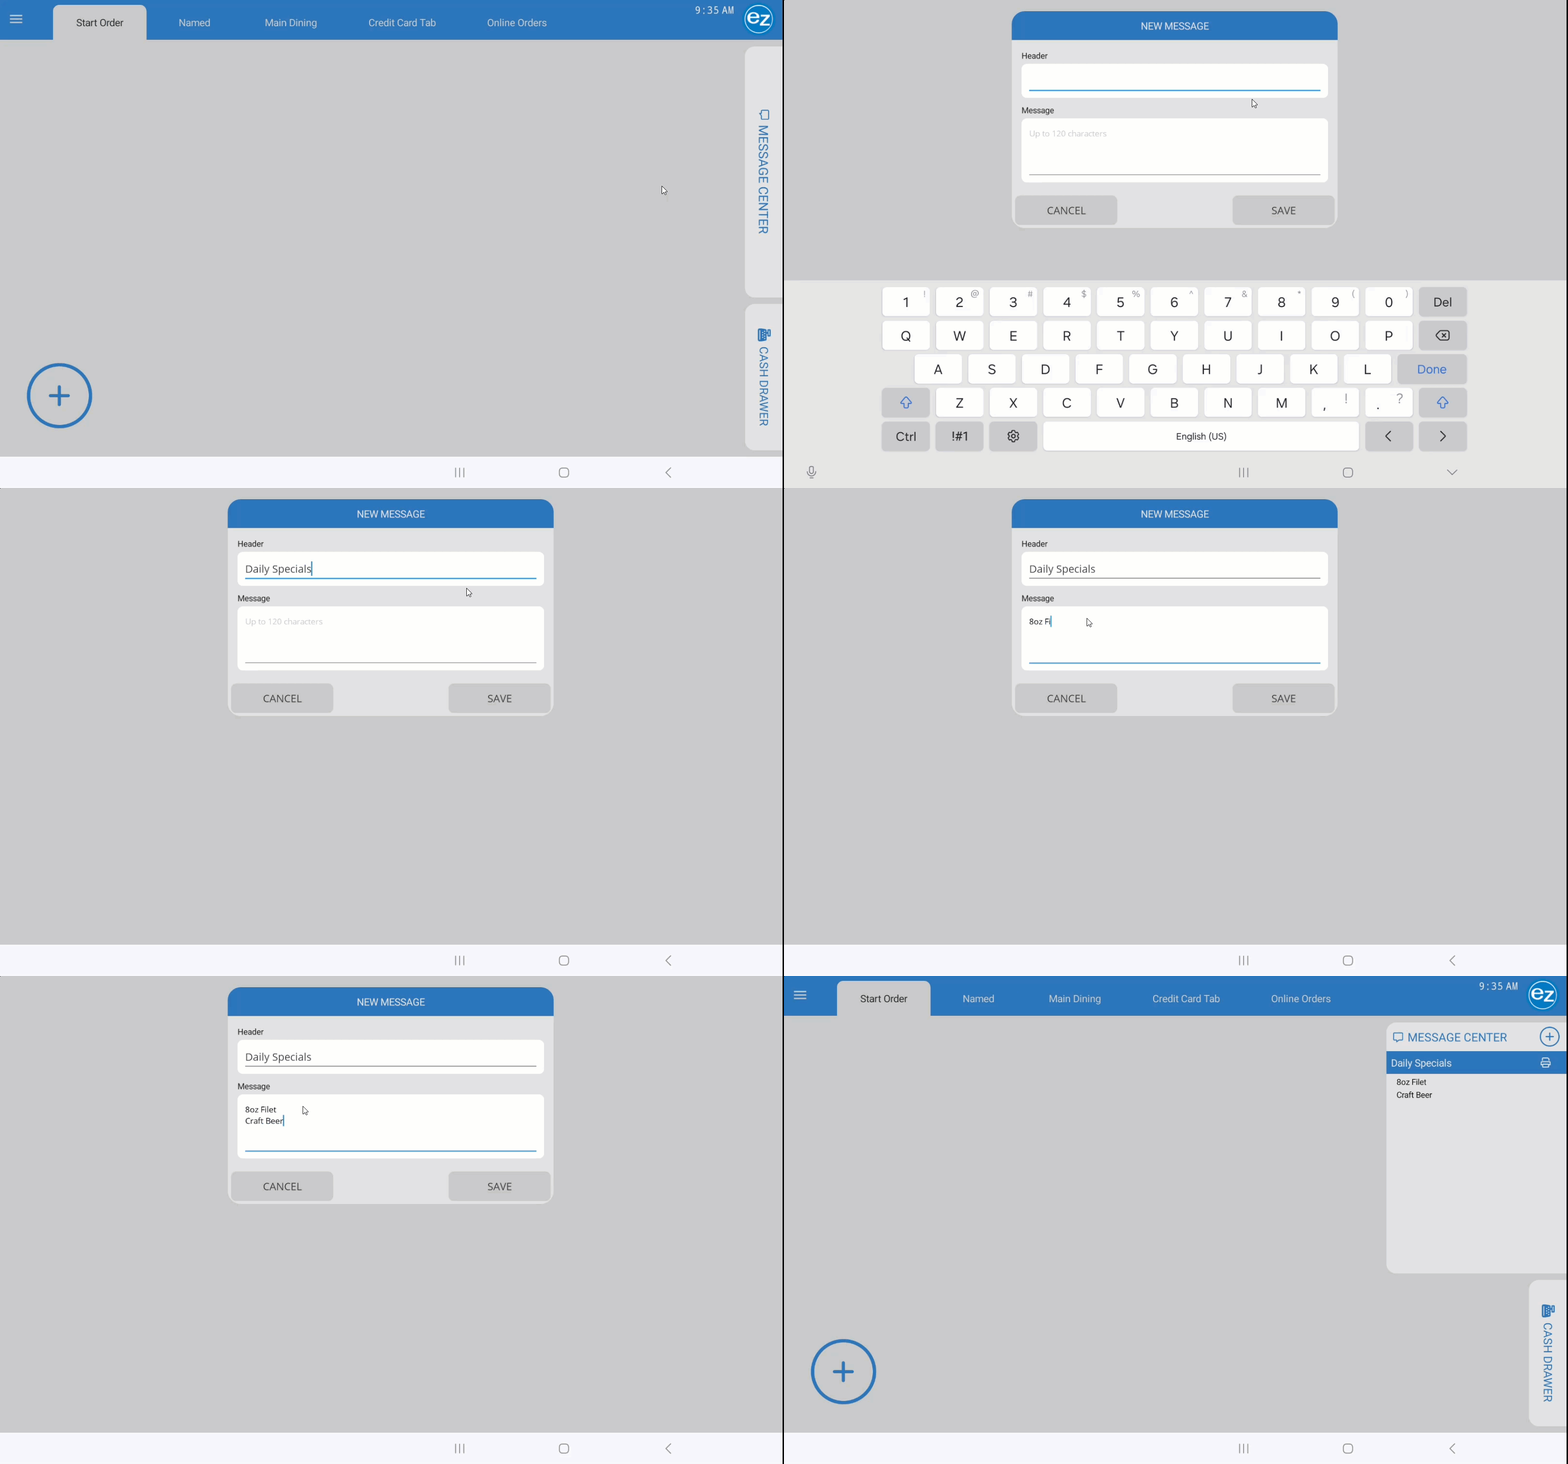
Create New Message
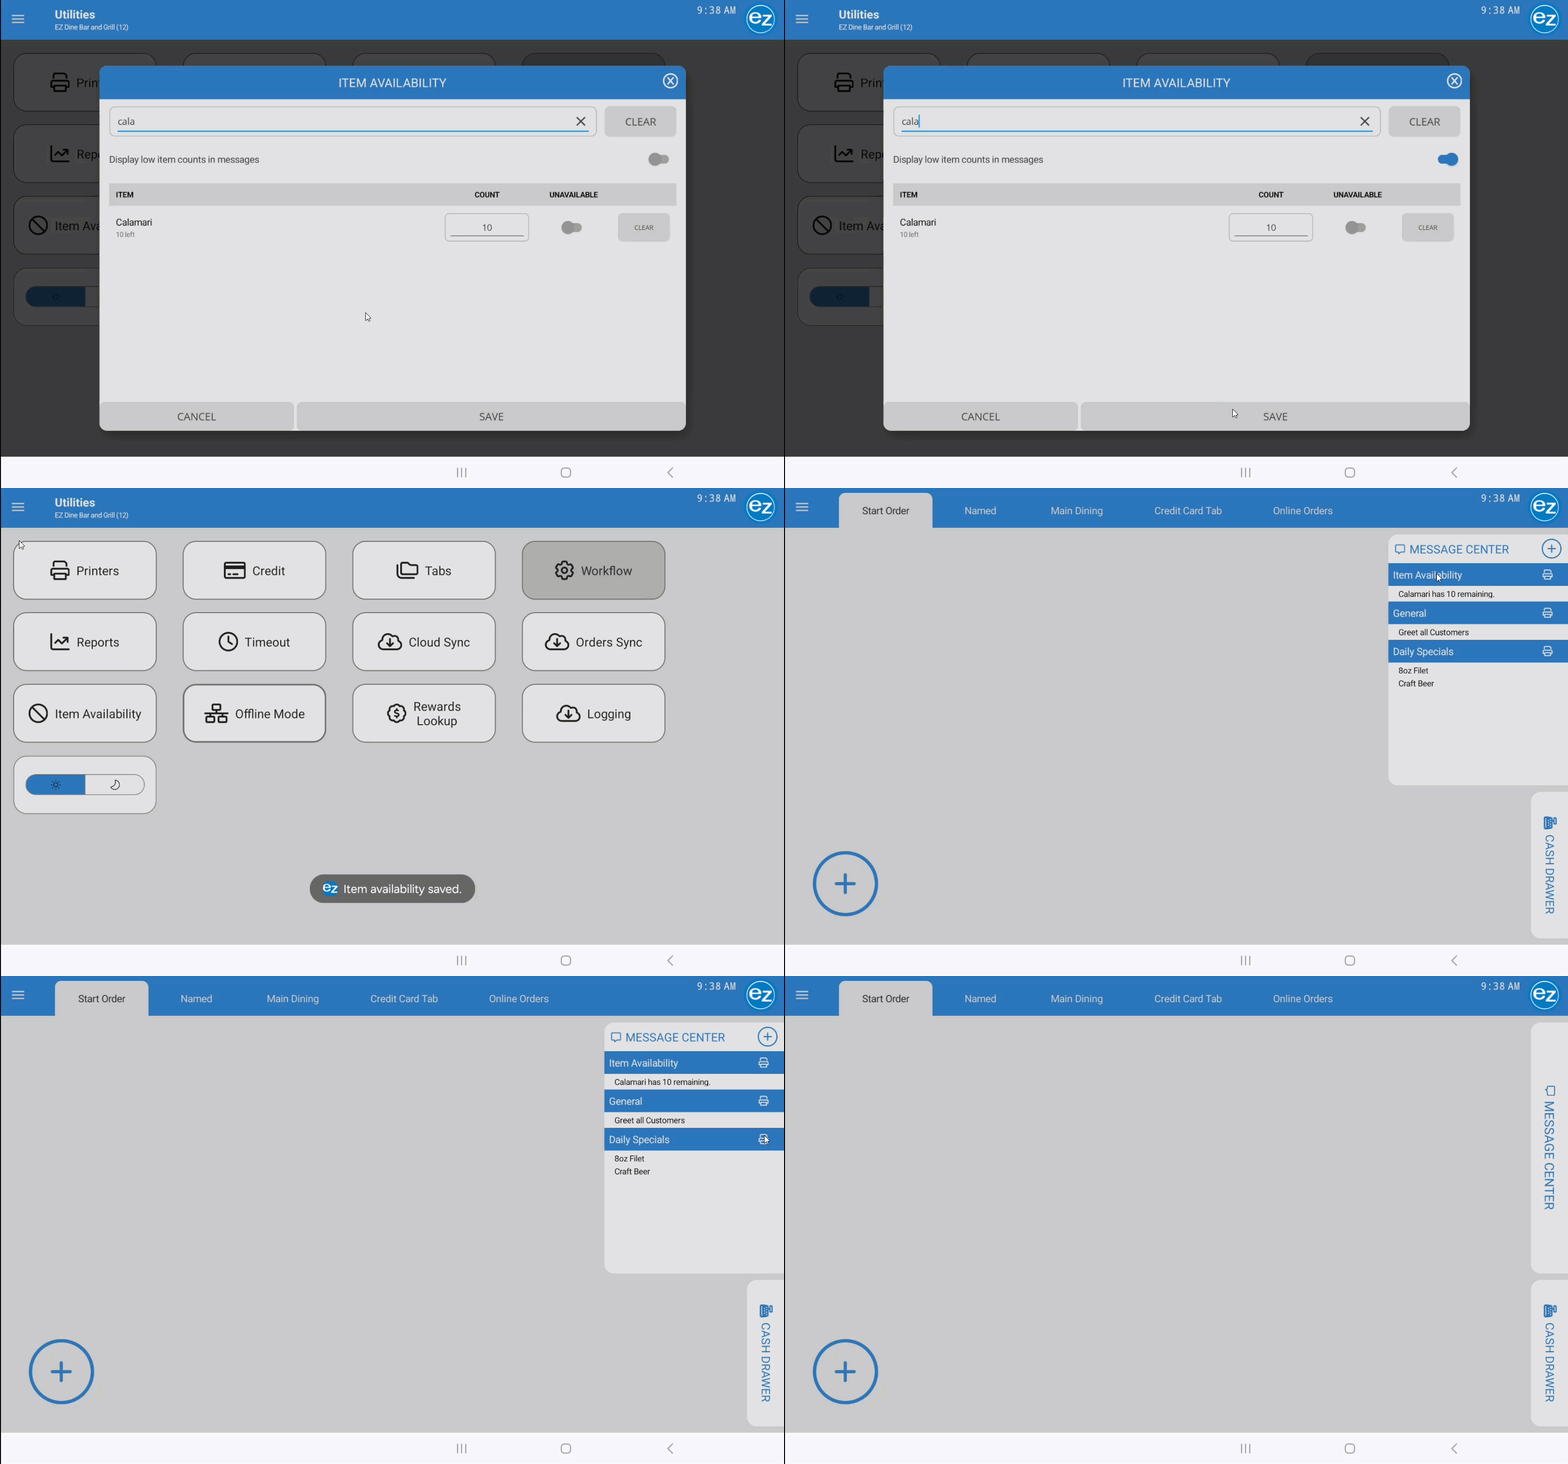
Low Item Counts
Step 2: Cash Drawer
Configure pay-out and pay-in reasons in EZ Dine Studio prior to managing cash drawer operations. Refer to the Pay-In/Pay-Out Studio reasons guide for setup instructions
- The cash drawer control panel allows management to perform cash adjustments, track non-sale drawer movements, and manually open the drawer for general operational needs
- Pay-Out: Records cash removed the drawer for non-order expenses (e.g., paying a vendor invoice or distributing claimed employee tips)
- Pay-In: Records cash added directly to the drawer (e.g., replenishing petty cash)
- Open Drawer: Manually triggers the cash drawer without recording a transaction
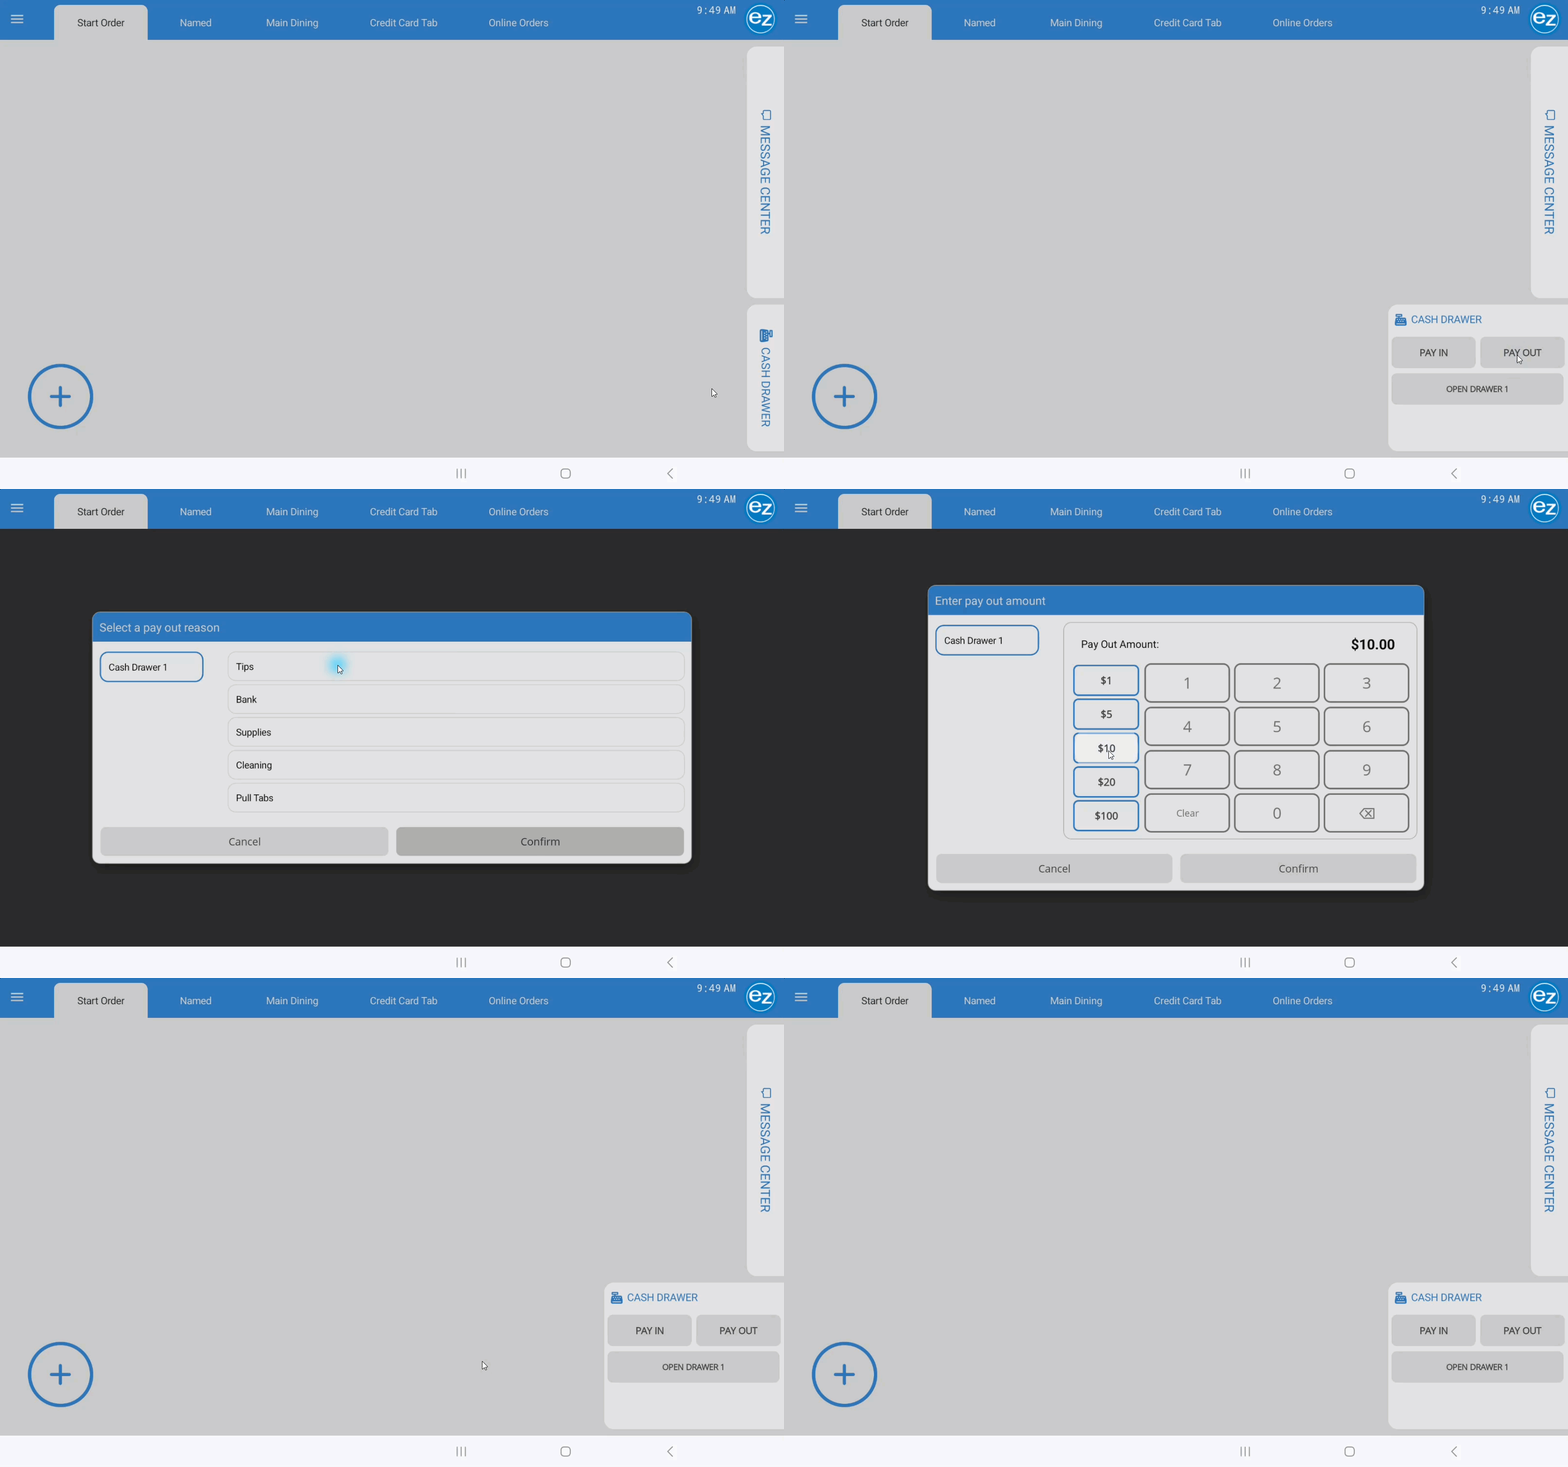
- Tap Pay-In or Pay-Out on the Cash Drawer control panel. The window opens, displaying the selected action type and assigned cash drawer number
- Tap the Reason field and scroll to select the appropriate Studio reason code
- Input the cash dollar amount using the numerical keypad
- Tap Confirm. The cash drawer opens, a receipt prints detailing the amount and reason code, and the transaction saves to the system
- Reporting & Auditing: The EZ Dine app automatically logs all pay-in and pay-out activity on the Cash Drawer Report and incorporates these adjustments into all shift end cash reconciliation reports
- Manual Drawer Access: Tap Open Drawer at any time to open the cash drawer for general operations needs outside of a recorded transacton
Step 3: Main System Menu
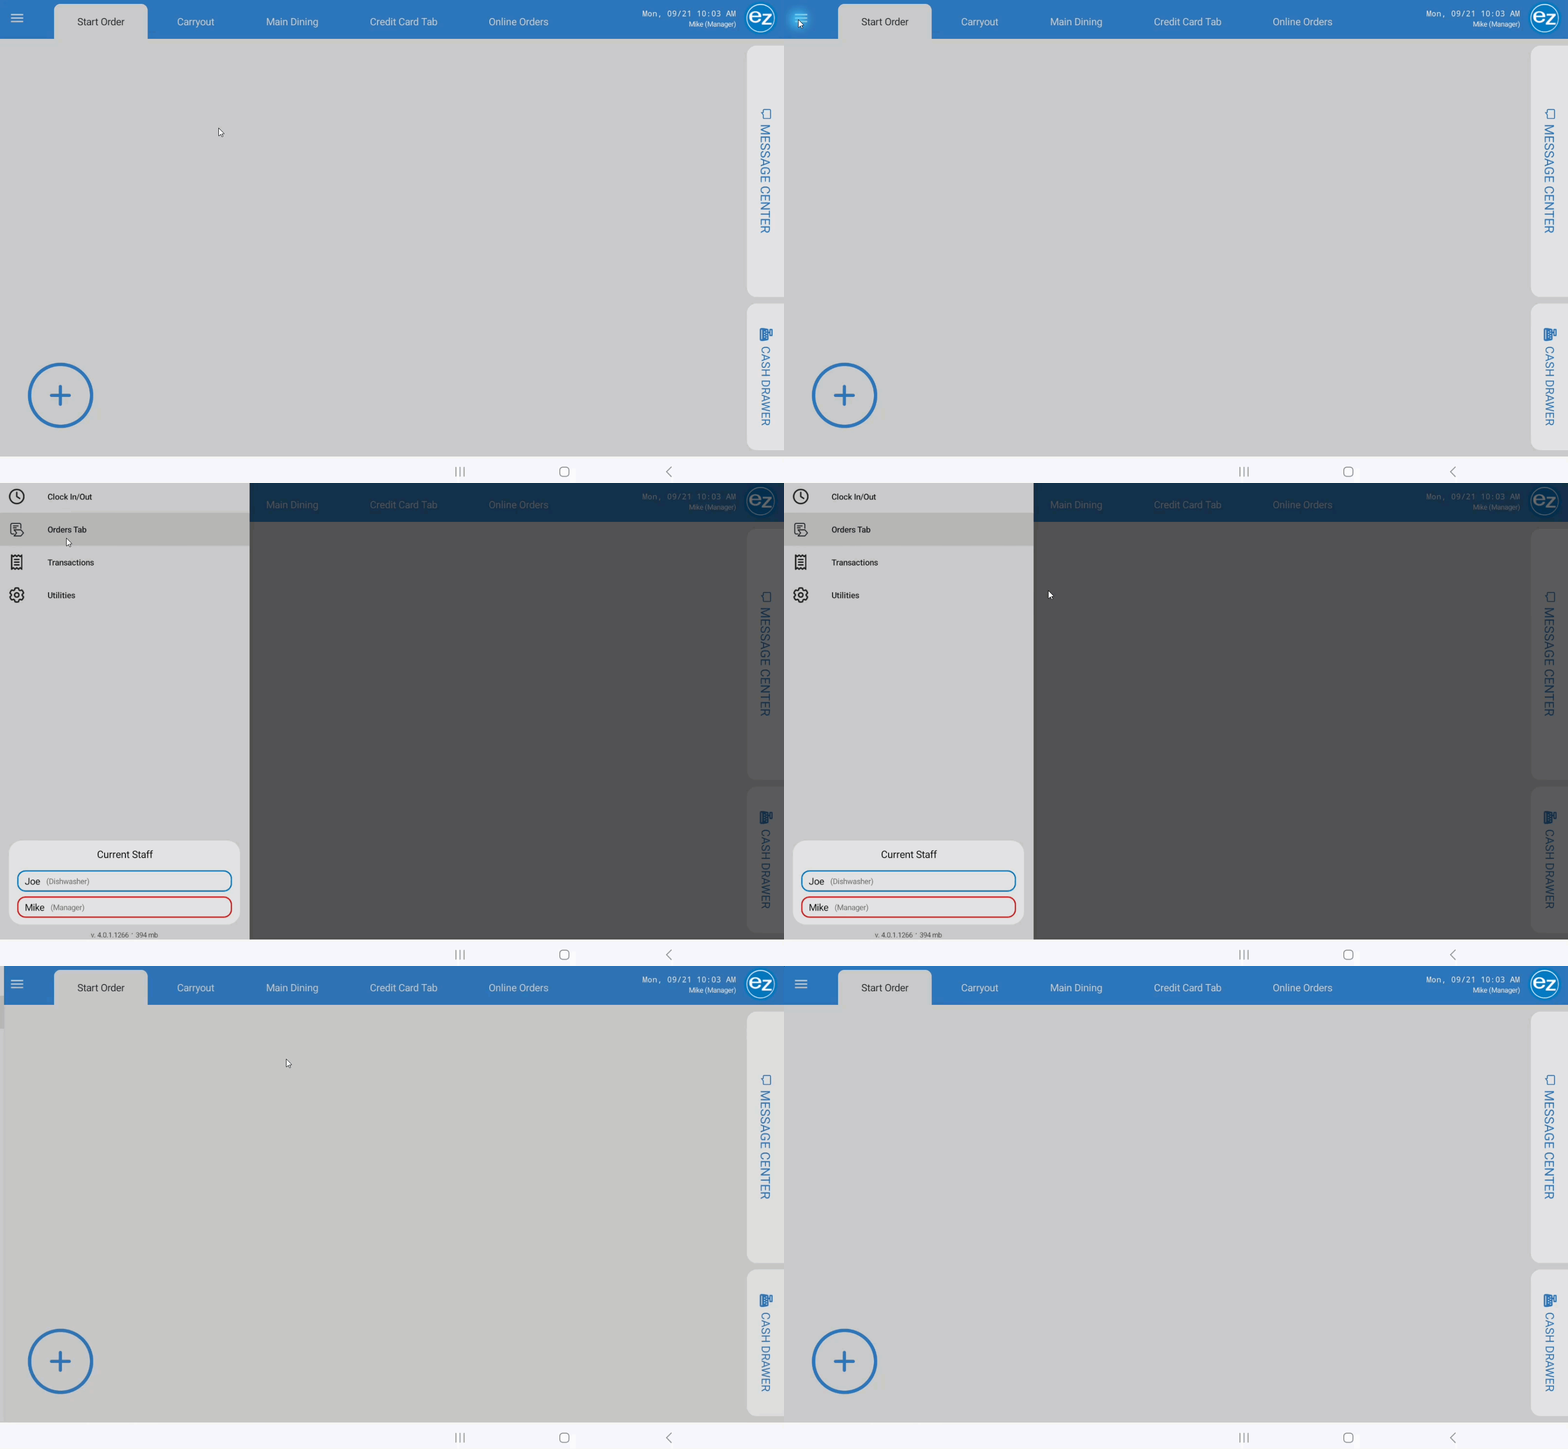
- The top-left Main System Menu icon will list different features that can be accessed dependent on the employee permission levels
- Clock IN/OUT will return back to the main login page
- Transactions will list all finalized orders for the twenty four hour business day for viewing and editing
- Utilities will have all admin level features for setting up and managing devices
Additional Resources and Help!
Still have questions? Please contact us any time at support@ezsoftpos.com.
NOTE: If emailing, please include your business name in the subject line of the email
and provide your preferred contact information for the best response time.
Visit our help center Help Center for more guides and tutorials