
TABLE OF CONTENTS
- Step 1: Login Screen
- Step 2: Clocking In
- Step 3: Clocking Out
- Step 4: Managing Open Orders During Clock-Out
- Step 5: Remote Force Clock Out
- Step 6: Tracking Employee Breaks
- Step 7: Use Device
- Additional Resources and Help!
Step 1: Login Screen
- Upon successful device registration, the EZ Dine app opens directly to the Clock In/Login Screen. From this page, employees can clock in or out for their shifts, start or end breaks, and access the device
- Main System Menu: Tap the Main System Menu icon in the top-left corner to open the side panel
- Displays all currently clocked-in staff members and the current software version number. Tap anywhere outside the side panel window to close it
- Connected Devices: Displays directly below the Main System Menu. The device currently in use is highlighted in green text to distinguish it from other network connected devices
- Custom Branding: Custom store images uploaded in Studio embed directly into the center of the numerical keypad. Refer to the Creating a Store guide for customized branding setup instructions
Step 2: Clocking In
Configure employee accounts and permission levels in EZ Dine Studio prior to clocking in. Refer to the Managing Employees Setup guide for details
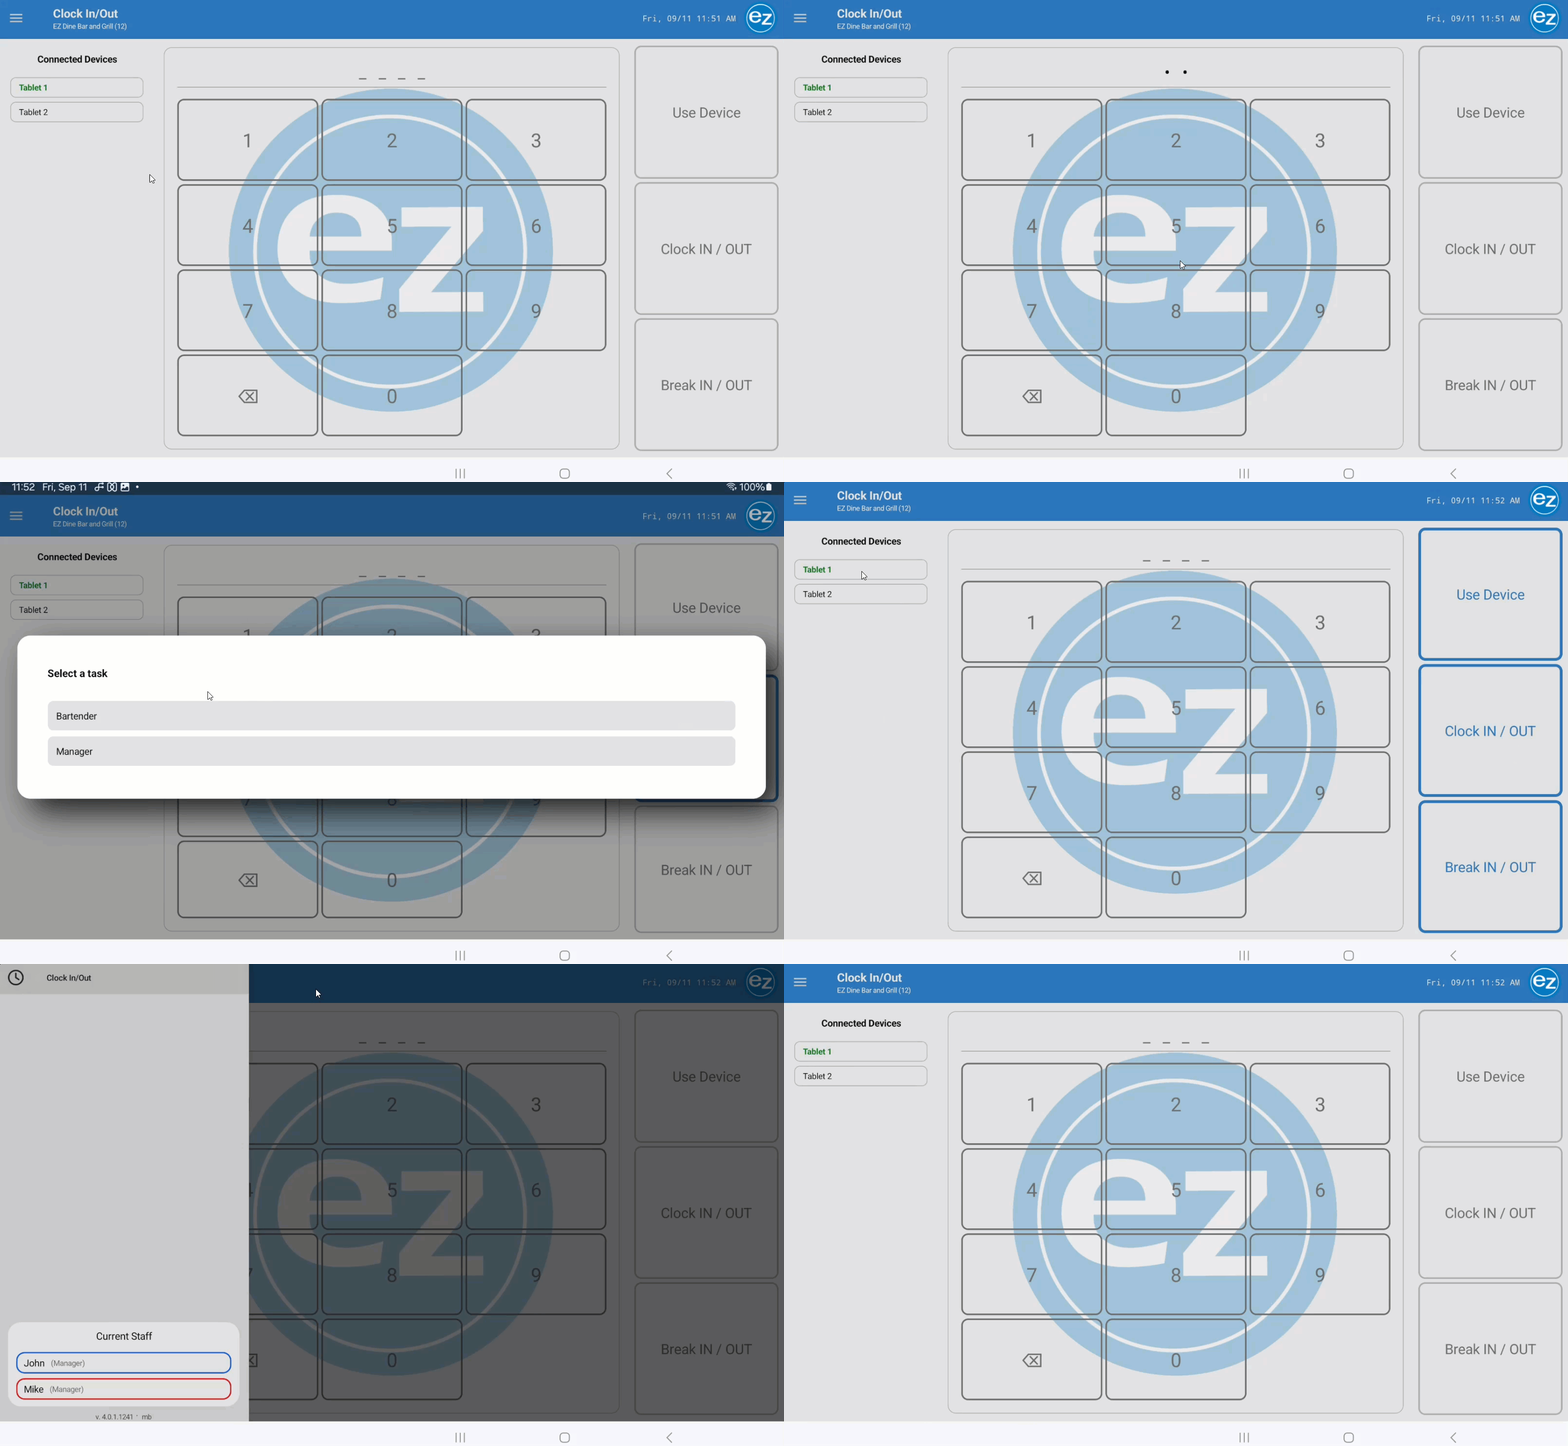
- Enter your four digit employee passcode on the center keypad. Once recognized, the three primary action tabs highlight with a blue border for five seconds
- Tap Clock IN/OUT
- Select your assigned job role from the task list
- Upon selection, your name, task, and assigned employee color appear under the Current Staff section in Menu Settings
- Entering an incorrect passcode or tapping an action button before entering a passcode displays a red warning message at the bottom of the screen: "Enter your passcode before using the device"
Step 3: Clocking Out
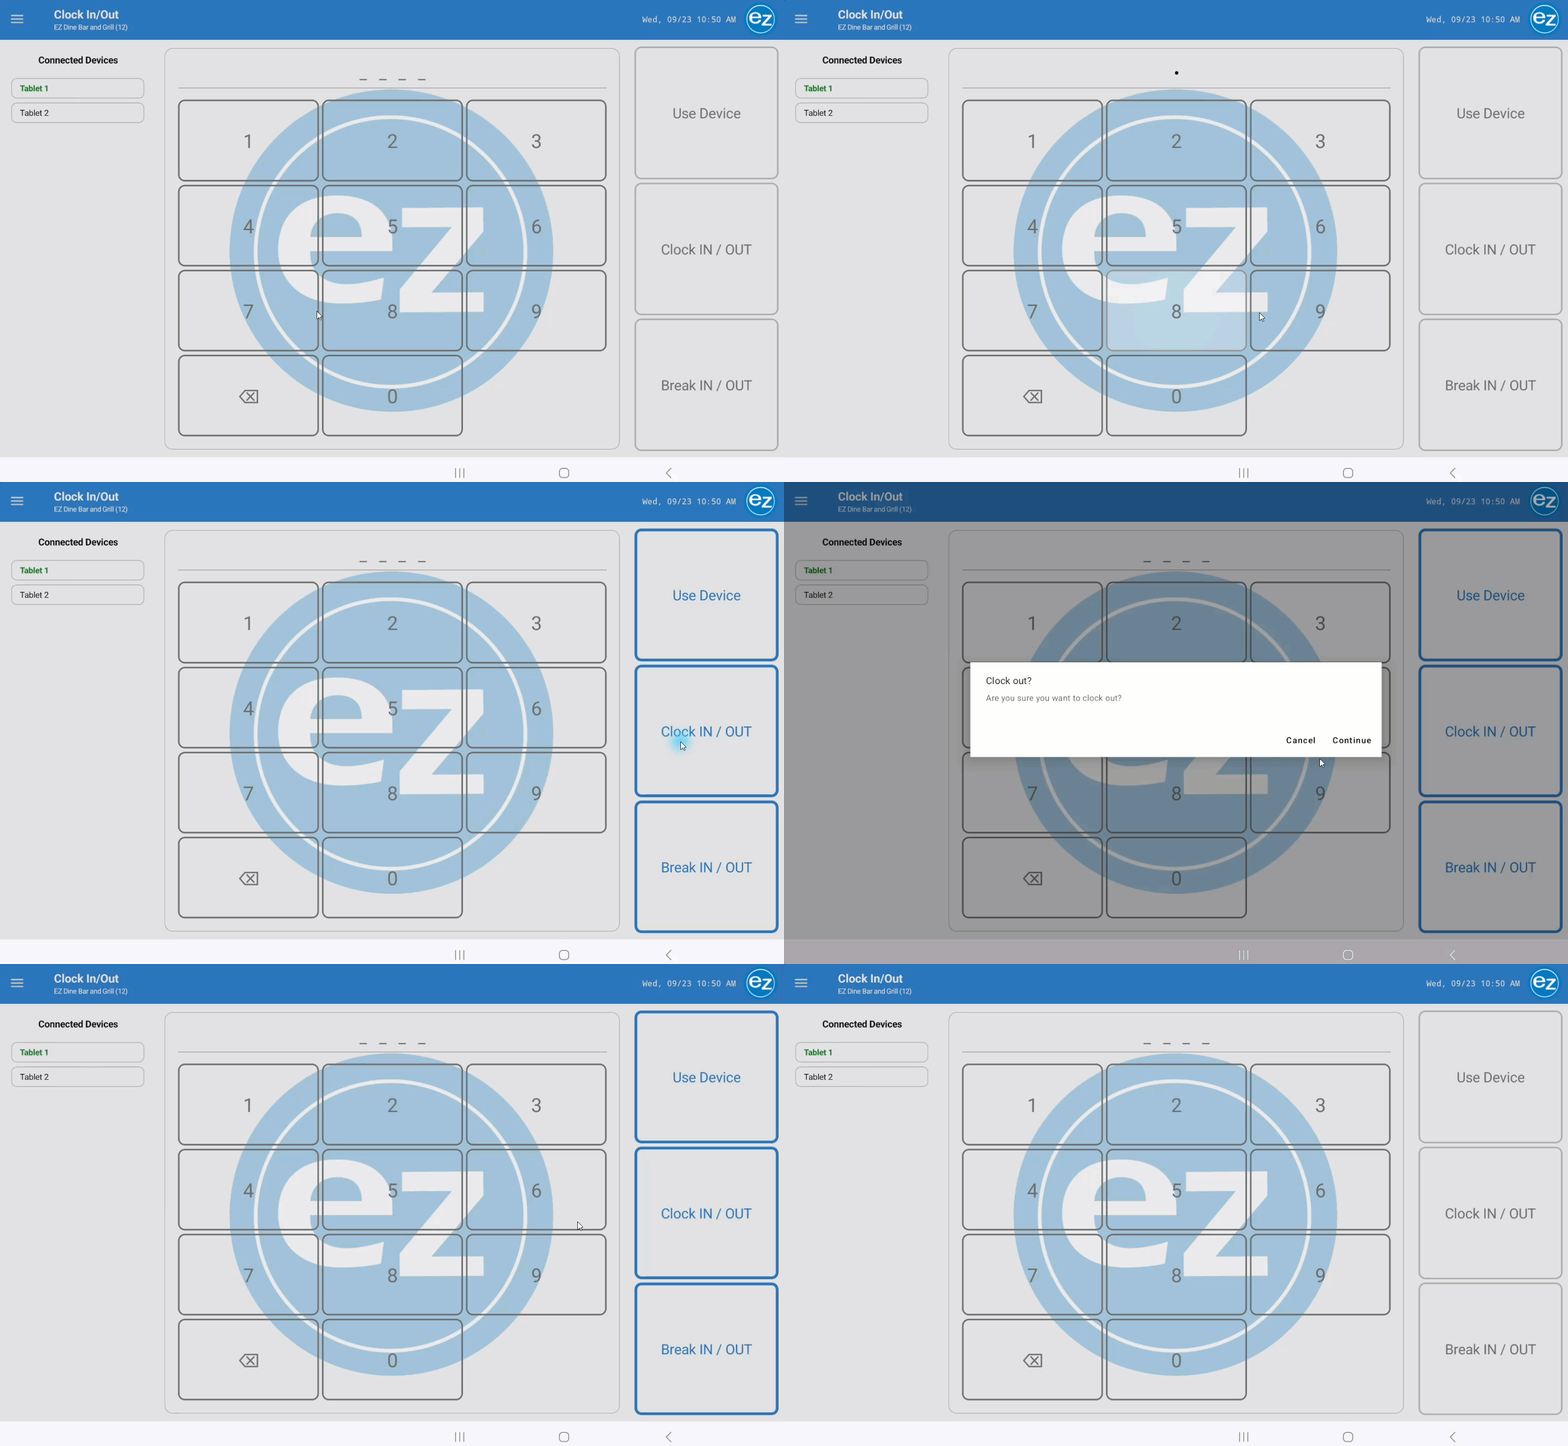
- Enter your four digit passcode and tap Clock-IN/OUT
- Tap Yes on the confirmation prompt to proceed, or No to cancel and return back to the main login screen
- The EZ Dine app prevents clock outs if you have open orders or are active on another device
- Clock Out Report prints automatically upon clock out (based on Studio report settings) detailing shift start/end times, total hours worked, break durations, and cumulative weekly hours
- End-Shift Report prints immediately following the clock out report if you transacted sales during your shift, detailing sales totals, calculated tips, and a summary of transaction related details
Step 4: Managing Open Orders During Clock Out
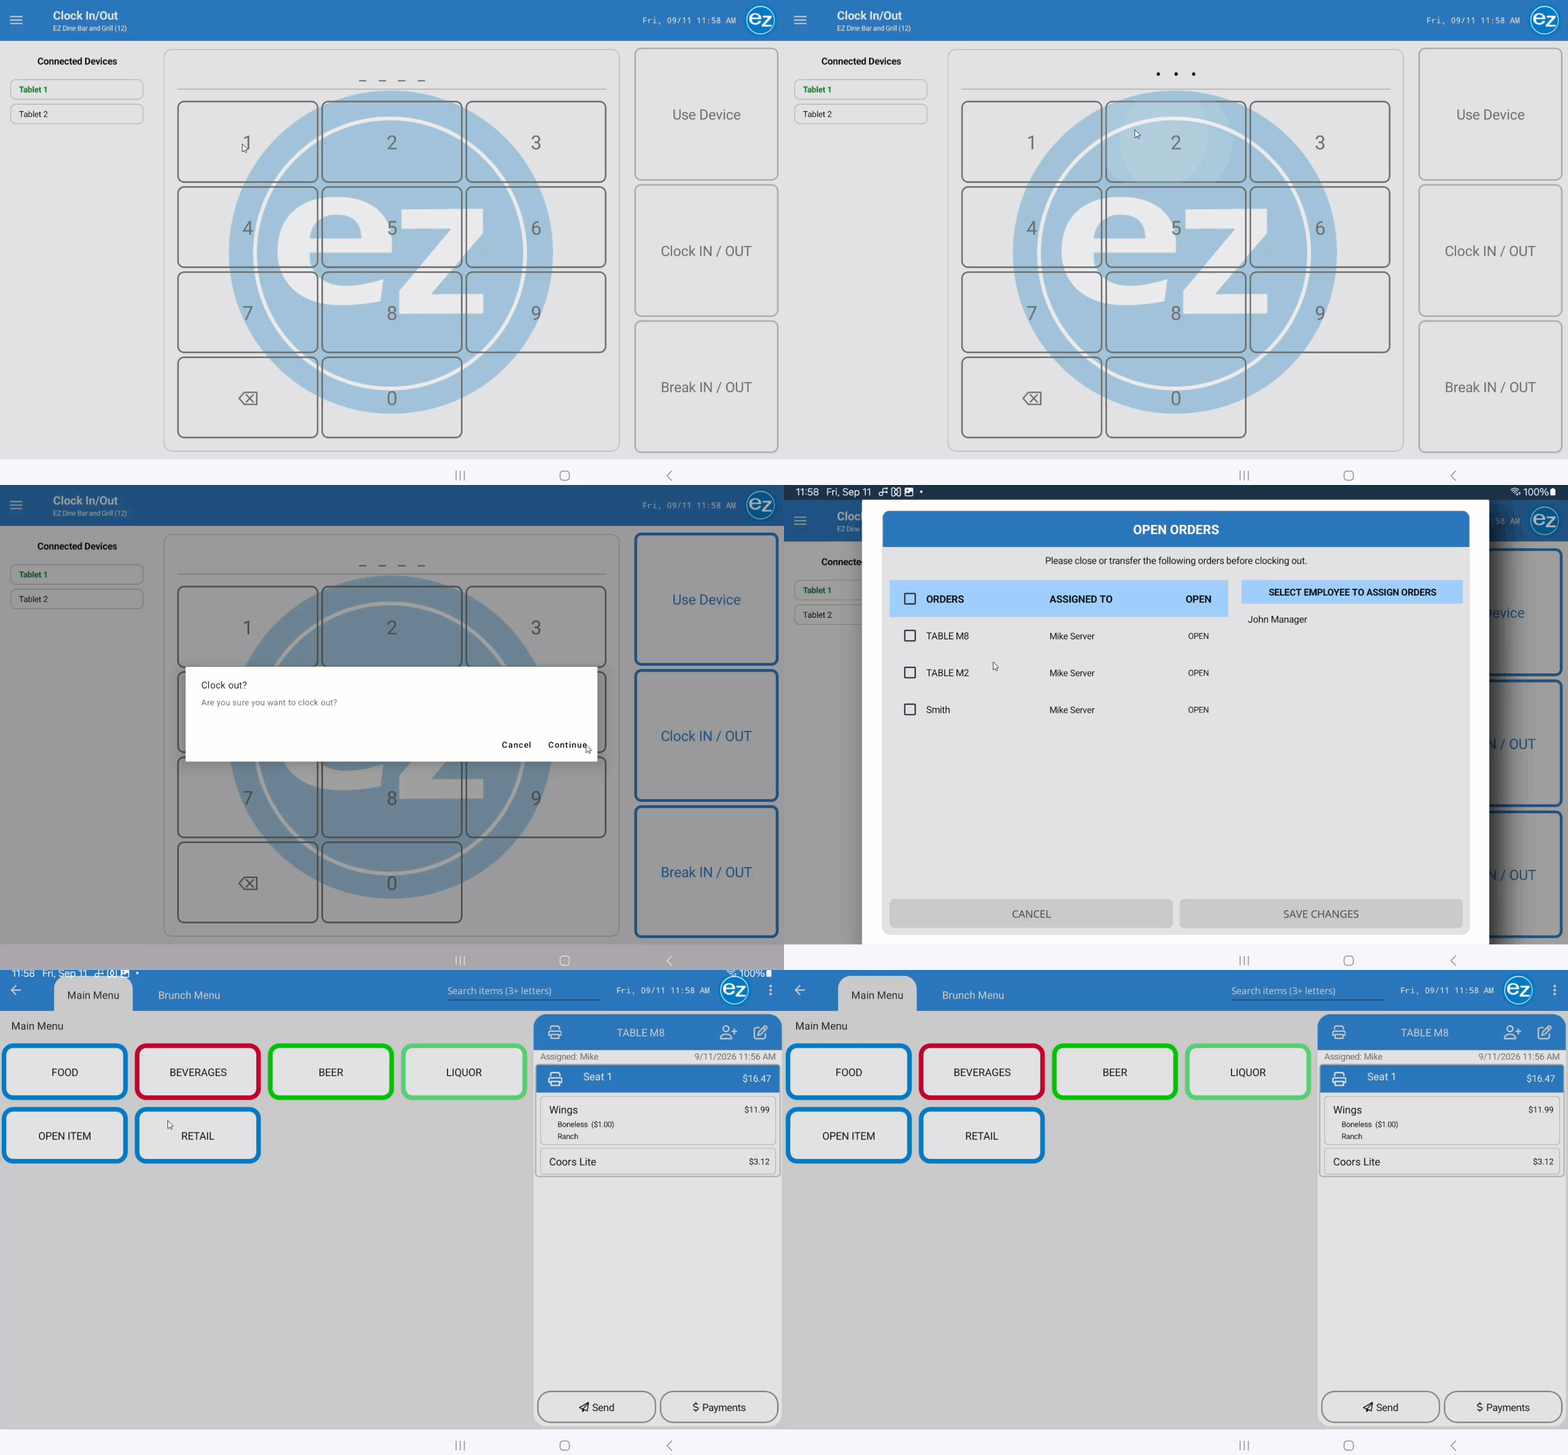
- Attempting to clock out with active orders automatically triggers the Open Orders window. You must close or transfer all remaining orders before the EZ Dine app allows you to complete the clock out process
- Tap the order name to access the ticket
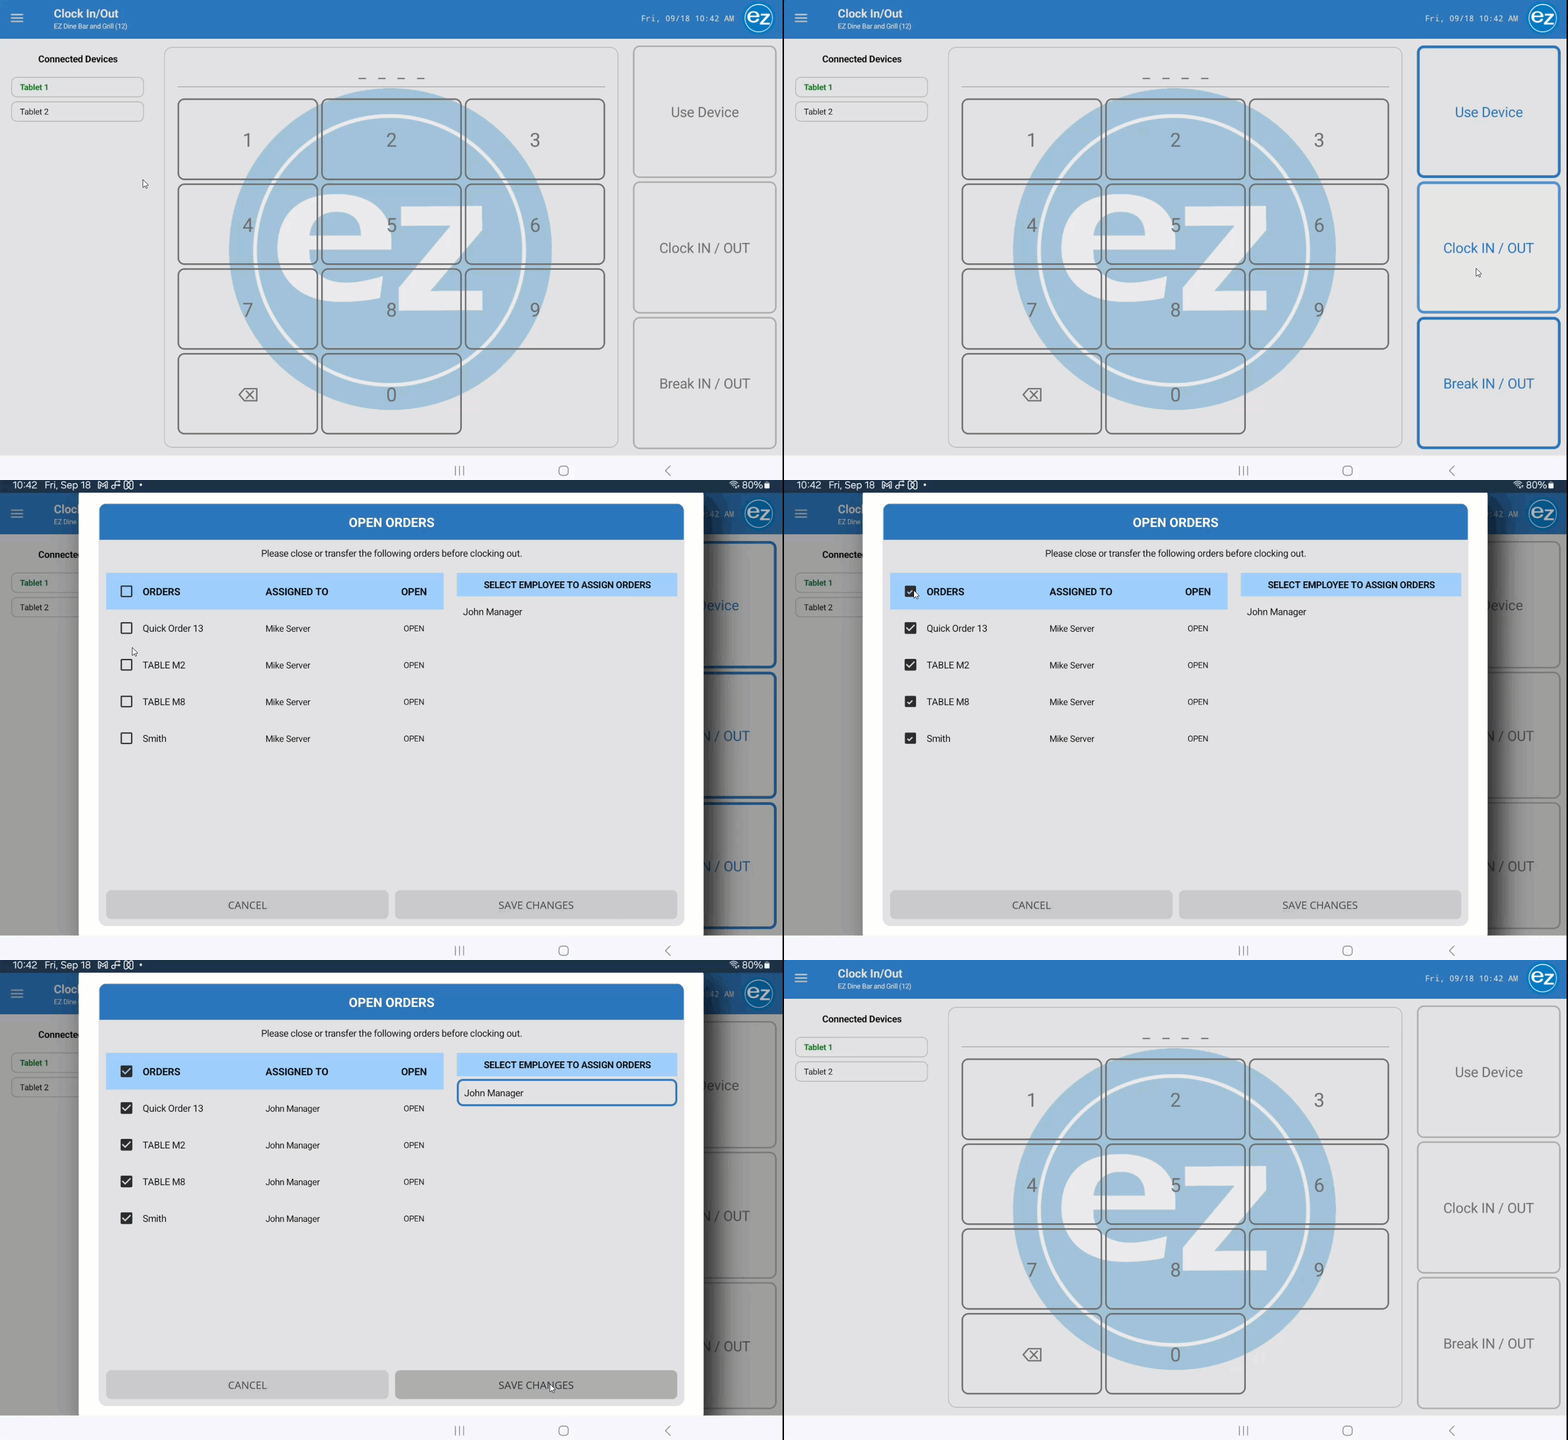
- Select the checkbox next to the individual orders, or check the top header box to select all orders at once to transfer
- Tap the name of an active employee from the list on the right. A blue border highlights their name to confirm selection
- Tap save changes to assign the open orders to the new employee
- Once all order tickets are closed or transferred, proceed with clocking out
Open Orders
Transfer Orders
Step 5: Remote Force Clock Out
- Managers can remotely force clock out employees who forget to clock out at the end of their shift via EZ Dine Studio. Refer to the Studio Force Clock Out guide for instructions
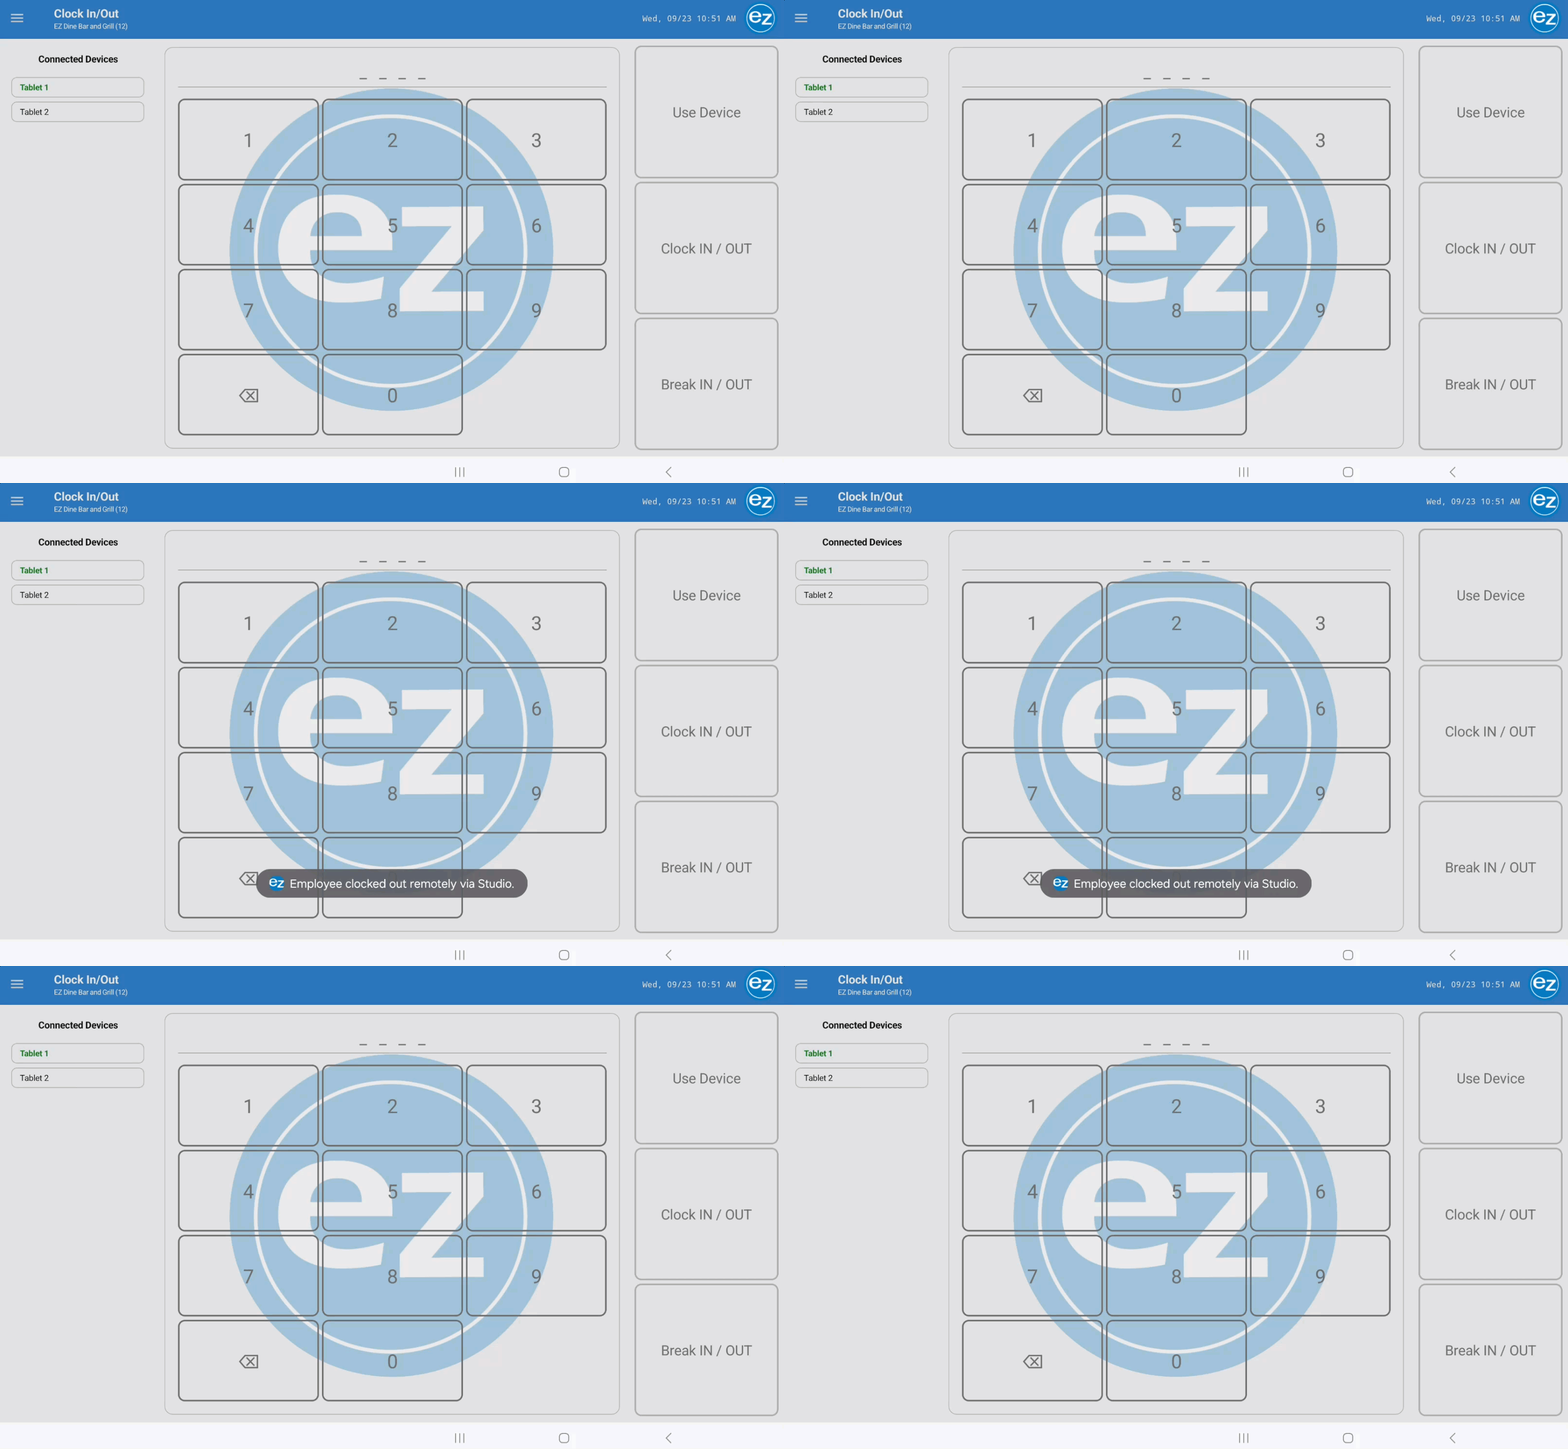
- When a remote clock out executes in Studio, connected devices automatically sync, remove the employee from the active staff list, and display a "Remote Clock Out" notice on the login screen
Step 6: Tracking Employee Breaks
- Use break tracking to log employee rest and meal periods throughout a shift while remaining clocked in
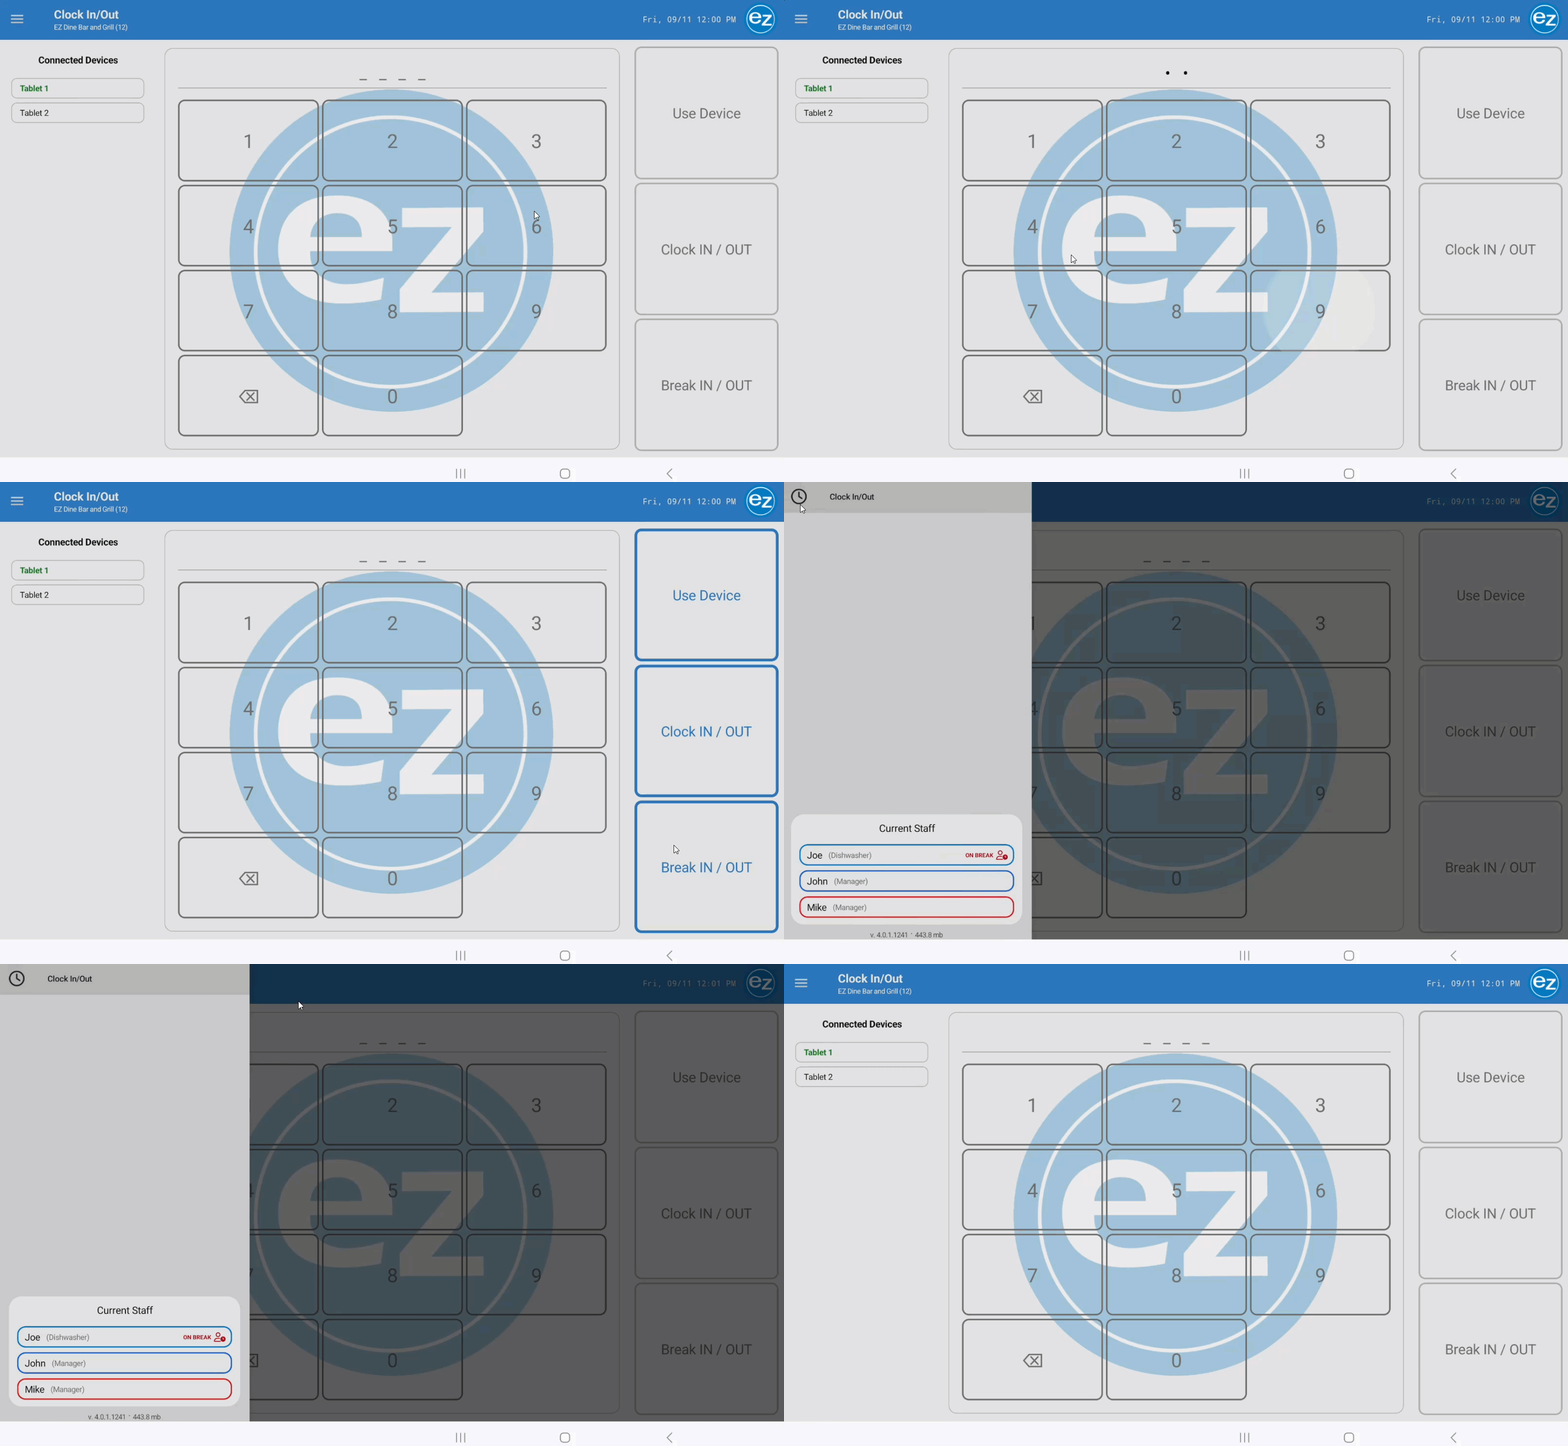
- Starting a Break enter your four digit passcode and tap Break IN/Out. ON BREAK and the break icon display in red text next to your name in the active staff list
- Ending a Break enter your passcode and tap Break IN/Out. Alternatively, employees with use device access can enter their passcode and tap Use Device to end their break and jump directly to the ordering screen
- Break durations are recorded in Studio Labor Details, Labor Summary, and Clock Out Reports
Step 7: Use Device
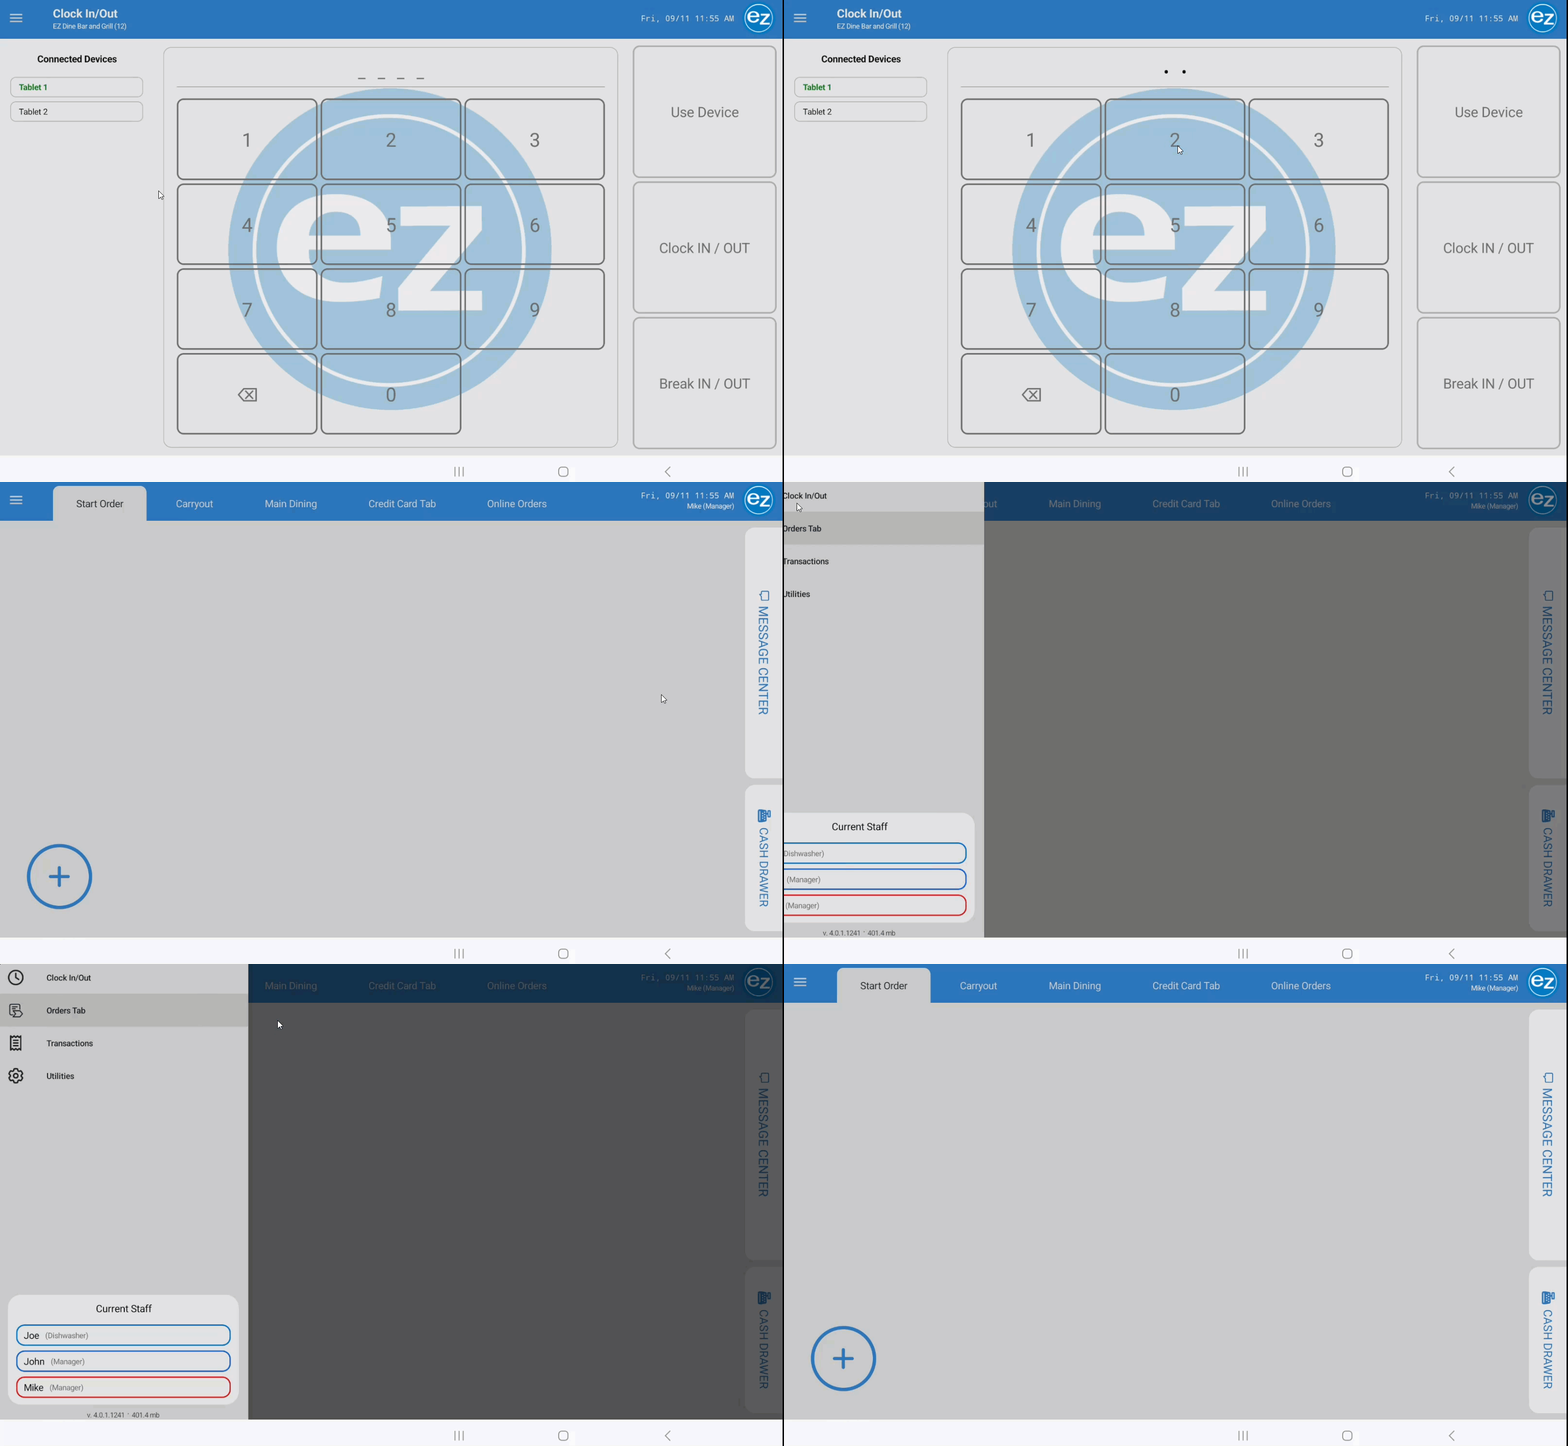
- Clocked In employees with Use Device permissions can access the main EZ Dine app ordering interface
- When using the device the employee name and job task who is logged in will be listed in the top right header
- Right panel houses the message center and cash drawer controls (If enabled)
- Top left main system menu features shortcuts to clock in/out (to return to the sign-in screen), Transactions, and Utilities for device configuration
- Access to specfic utility tools and settings panels depends on the employee's assigned permission level in Studio
Additional Resources and Help!
Still have questions? Please contact us any time at support@ezsoftpos.com.
NOTE: If emailing, please include your business name in the subject line of the email
and provide your preferred contact information for the best response time.
Visit our help center Help Center for more guides and tutorials