TABLE OF CONTENTS
- Step 1: Payment Page
- Step 2: Move Items
- Step 3: Printing Receipts
- Step 4: Closing Paid Seats
- Step 5: Tip Prompt Screen
- Additional Resources and Help!
Step 1: Payment Page
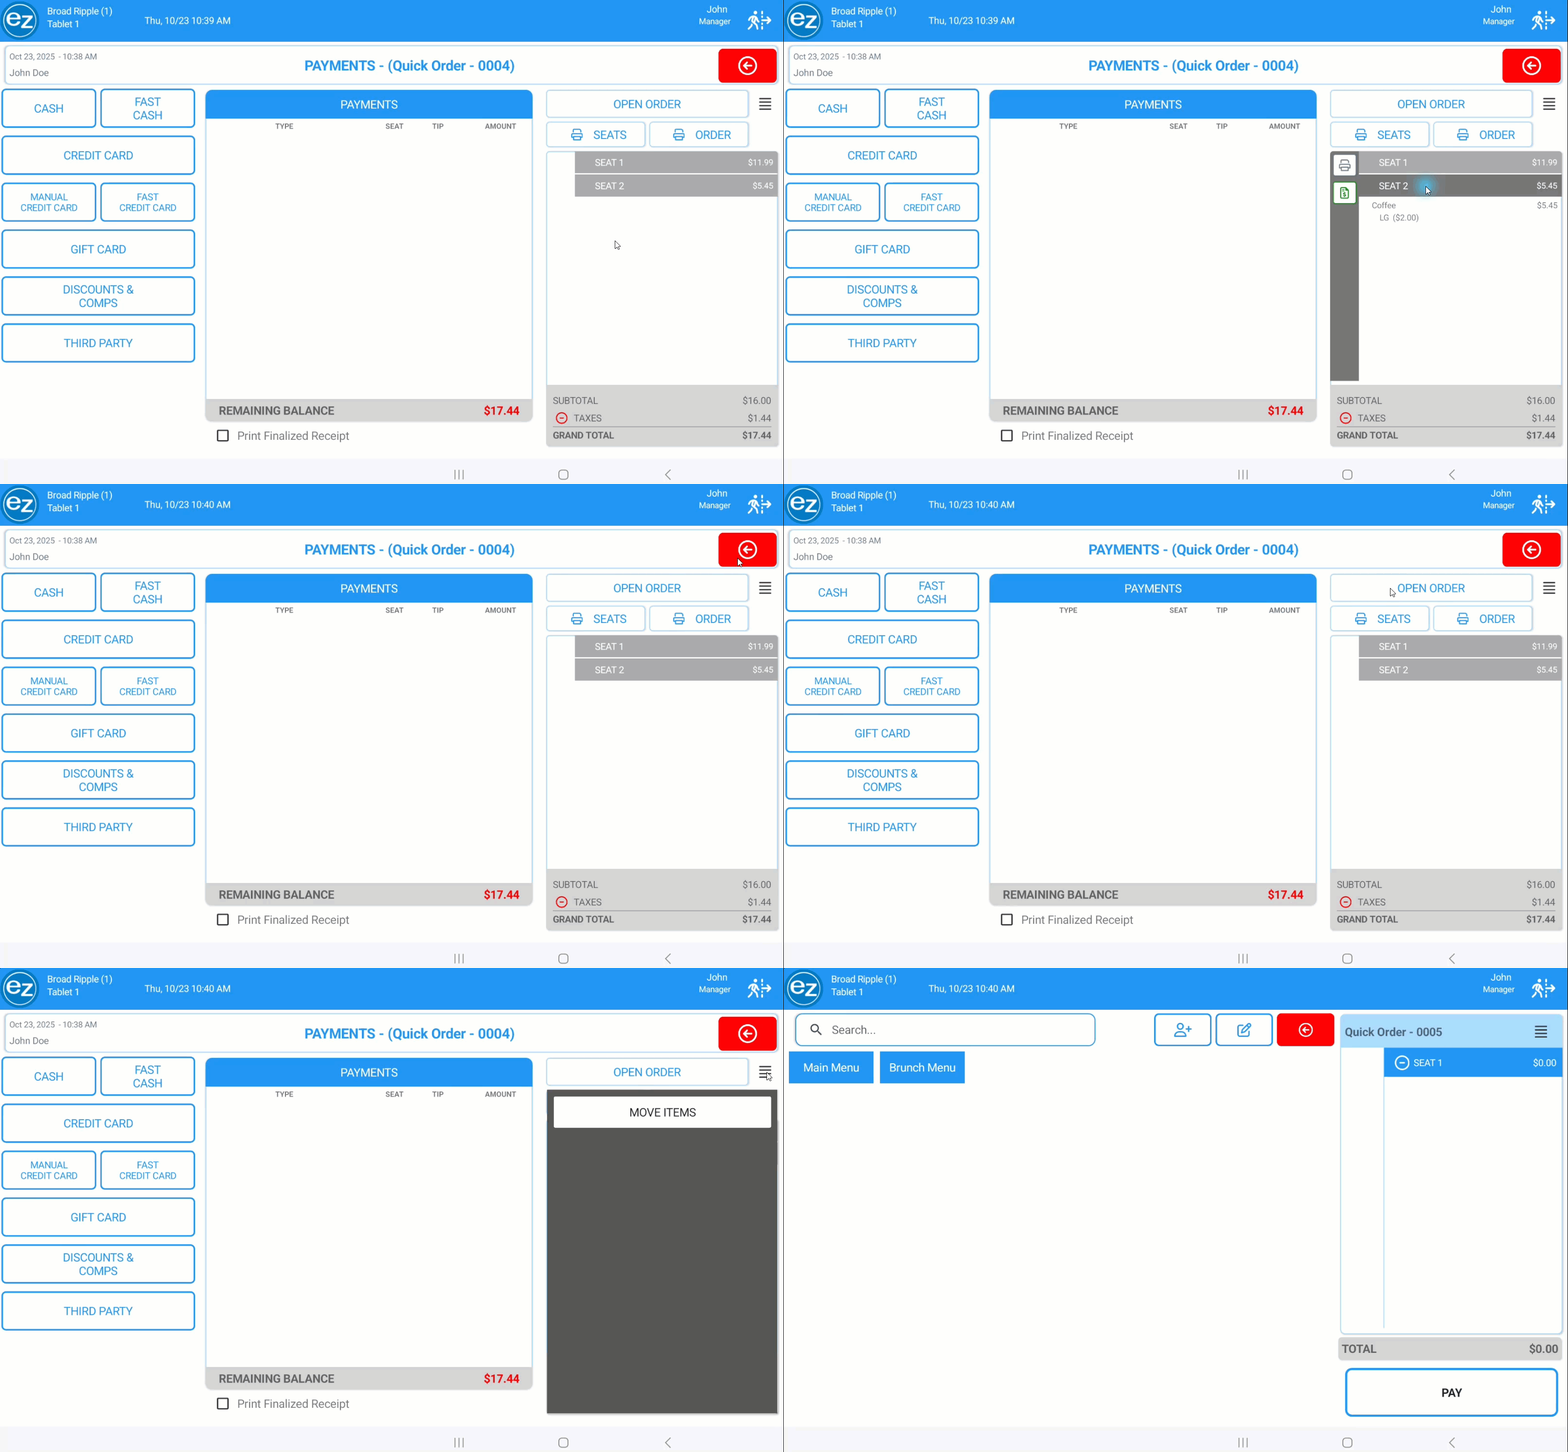
- When items on the order has been sent the payment page will become accessible
- From the payment page you will be able to organize items, print receipts, modify the order total, and finalize the transaction
- The top heading will list the order start date/time, employee name, order section name and identifier, employee who is logged into the device, exist screen icon, and the red back arrow button that will navigate back to the ordering tabs section
- The bottom section will list the remaining balance from the payments applied, the order subtotal, taxes, and grand total
- For viewing and collapasing the seat details press the seat number header
- Exist screen icon in the top right corner will navigate automatically back to the main login page
- Red back arrow when selected will take you back to the ordering tab section
- Open order tab will reopen the order back to the menu/ordering page to make any edits to the order as needed
- Additional payment options will be listed under the four horizontal lines icon next to the open order tab
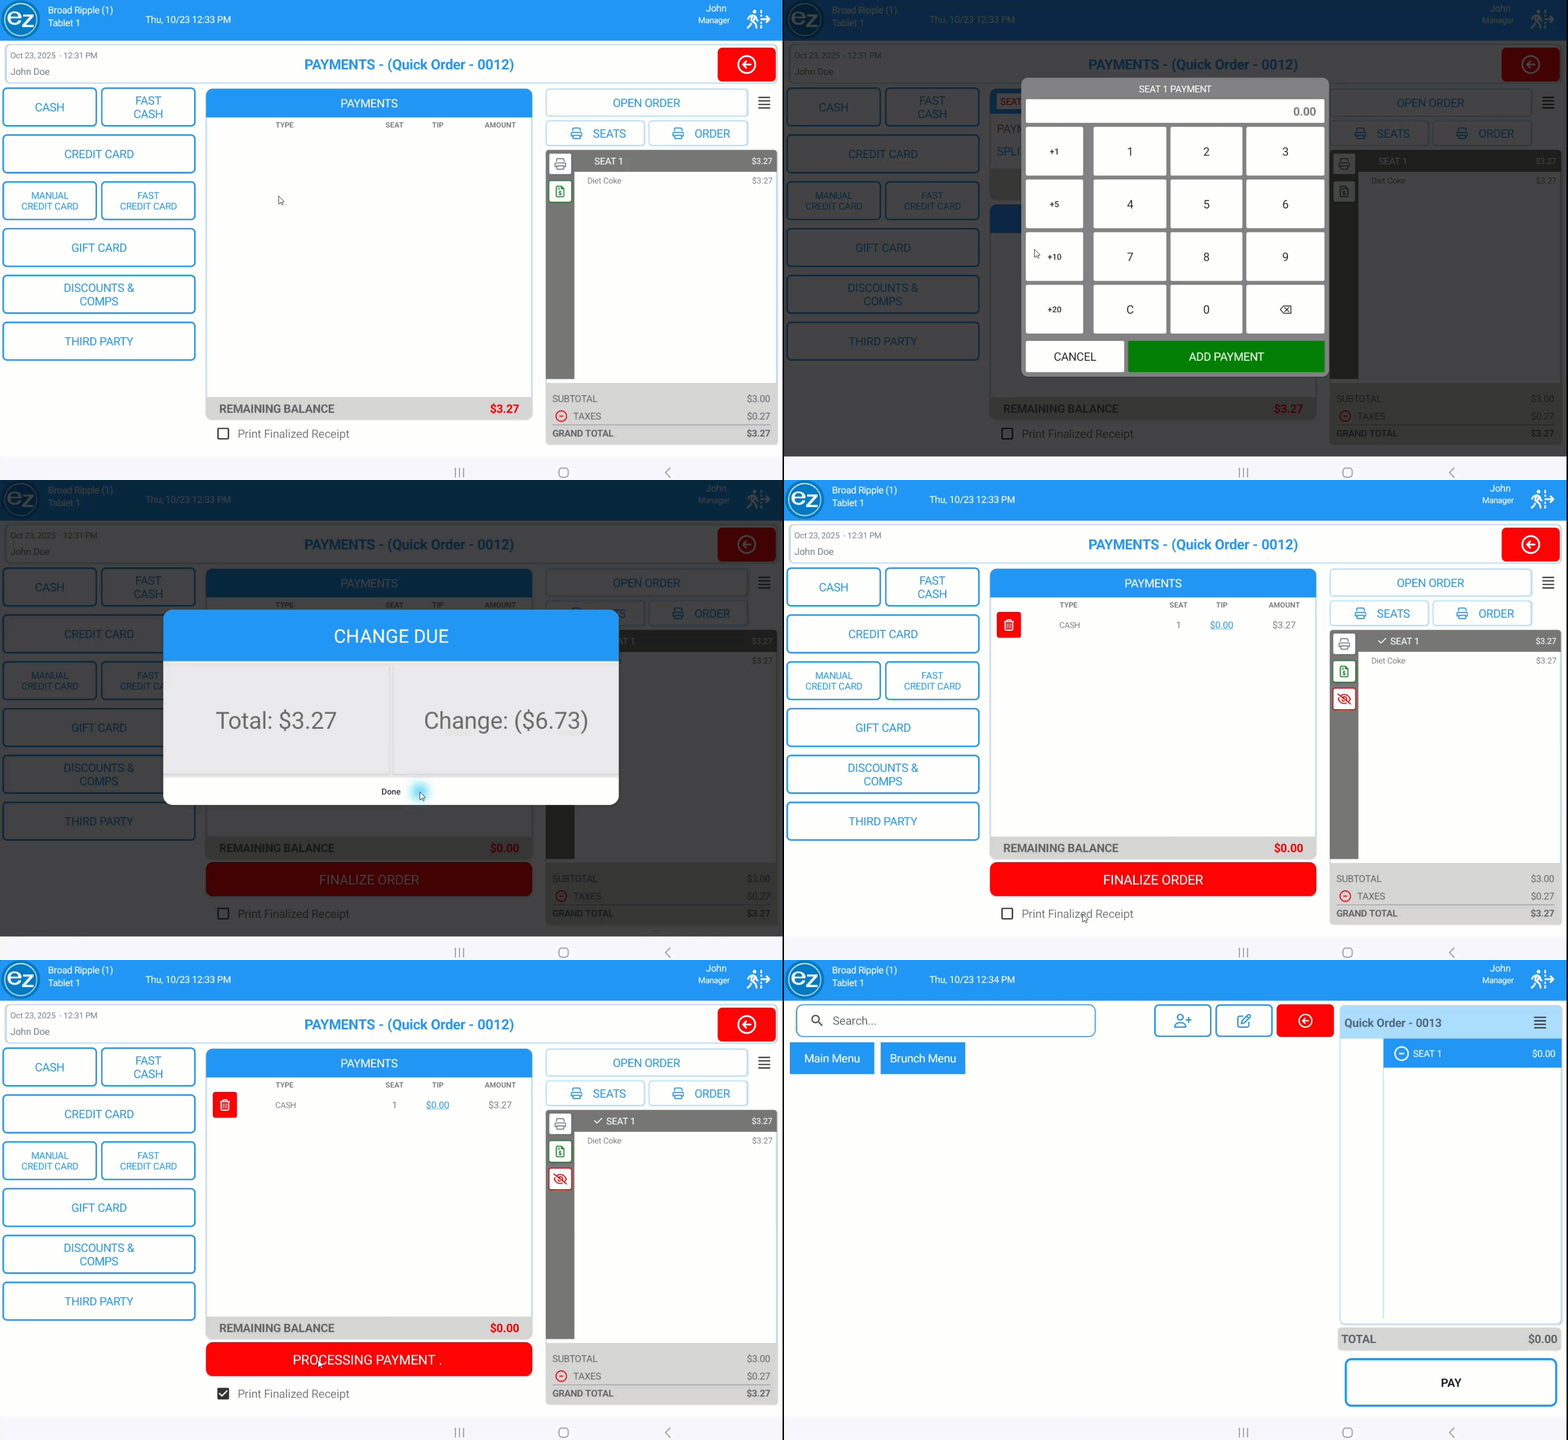
- When ready to finalize the transaction select the red finalize order button at the bottom
- Finalize order will change to processing payment indicating the payment and transaction information is being synced back to EZ Dine Studio
Step 2: Move Items
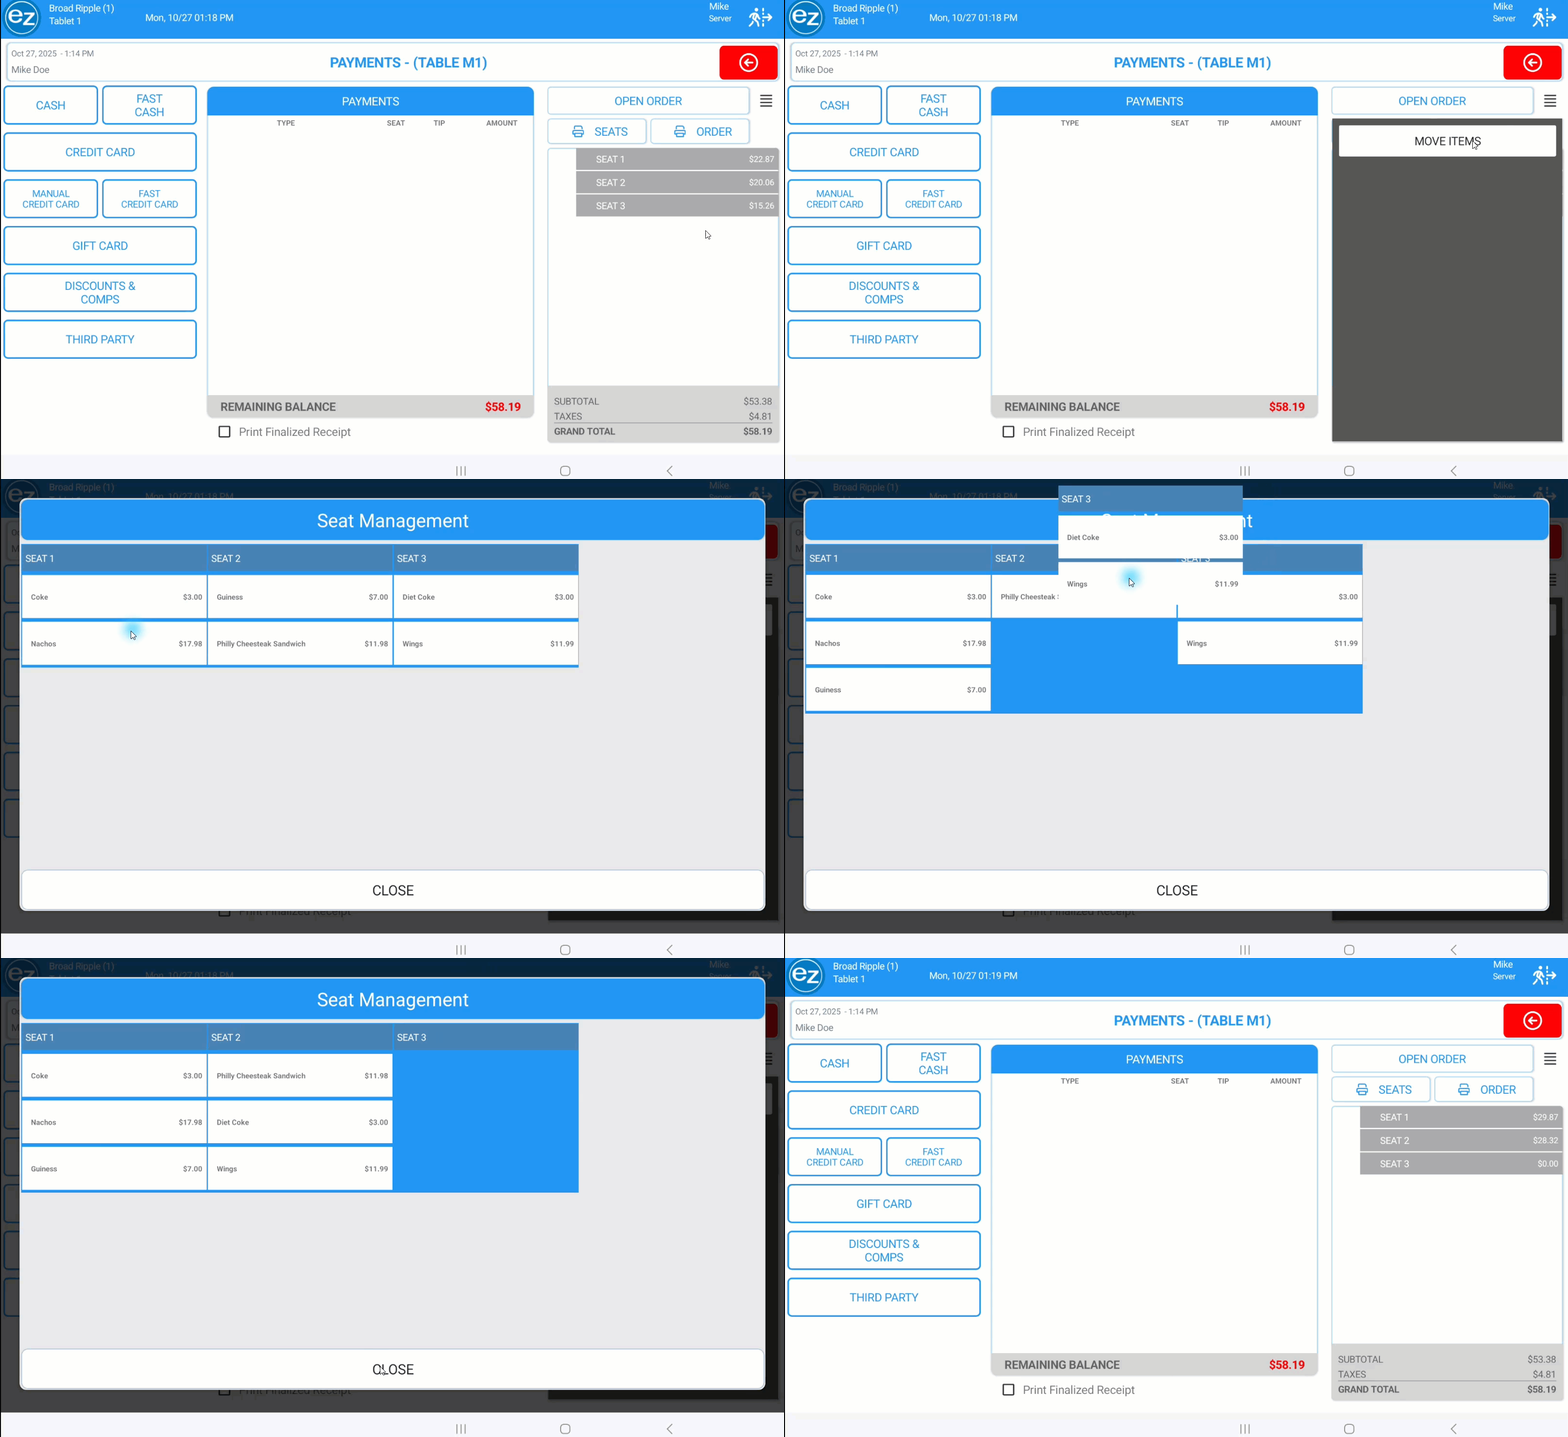
- Managing items attached to the individual seats for payments can be done through the seat management section
- Select the additional payment options icon located next to the open order tab
- Press move items and the seat management section will be displayed. You will now have the ability to move individual items or the entire seat from one seat to another
- Simply drag and drop the item or entire seat to the desired seat location. The drop area will be anywhere inside the seat's blue background
- When finished hit close and you will return back to the payment page
Step 3: Printing Receipts
- Tap the seat number header to expand the seat options. The print icon next to the seat number will print the individual customer receipt for that seat
- Printing all the customer receipt seats at once can be done by selecting the print seats tab
- For printing a single customer receipt for the entire order can be done by selecting the print order tab. This will print one receipt listing each seat's total individually on the receipt
- When finalizing an order you will have multiple finalized printing options that can be set on Studio
- Finalized receipt printing is OFF: The print finalized receipt option will be hidden on all orders
- Finalized receipt printing is ON: The print finalized receipt option will be checked automatically. You will have the option to uncheck the finalized print option as needed
- Finalized receipt printing prompt: The print finalized receipt option will be unchecked and can be turned on as needed per order
Printing Receipts
Finalized Receipt Printing Off
Finalized Receipt Printing On
Finalized Receipt Printing Prompt
Step 4: Closing Paid Seats
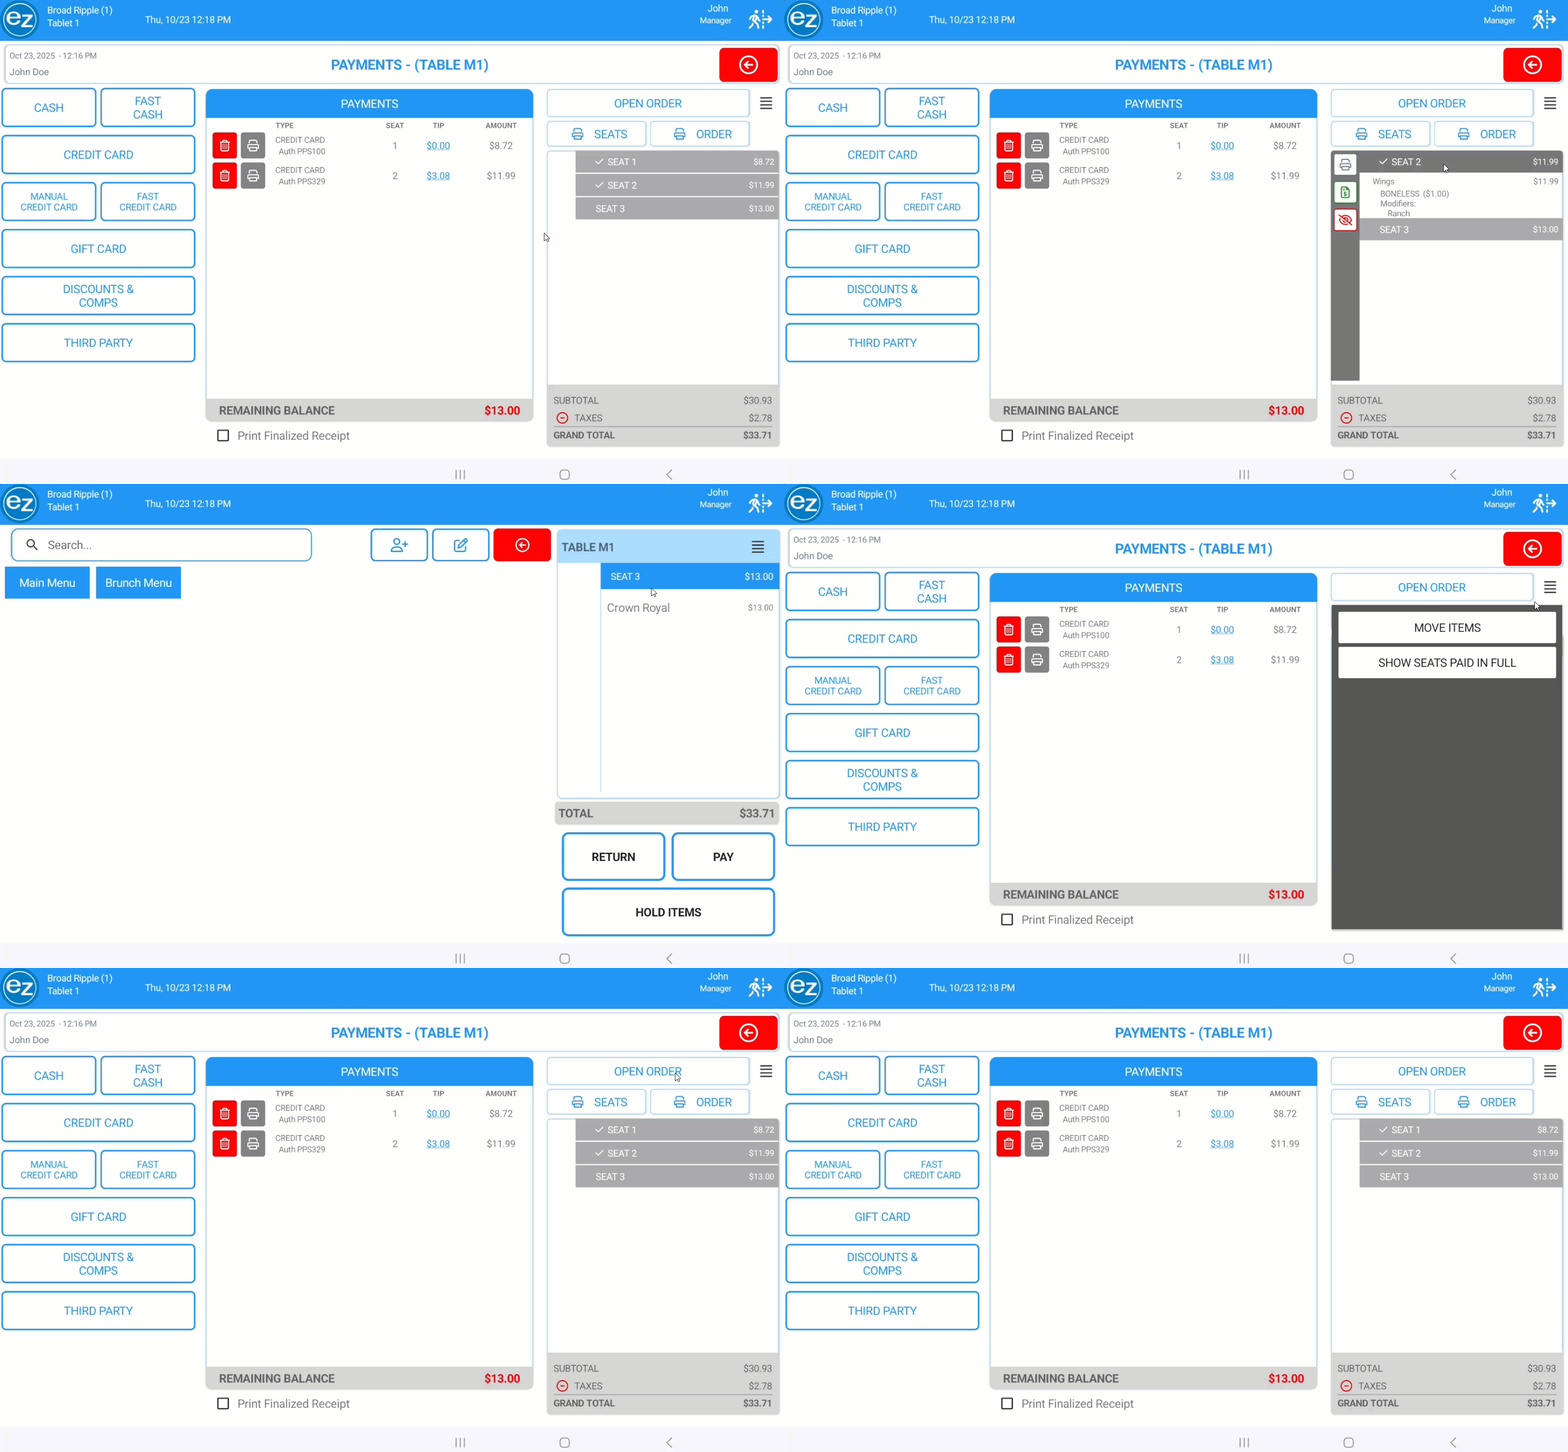
- When a seats balance is paid in full you will have an option to close and hide that seat from being viewed on the payment and order pages
- Once the payment has been applied to the seat there will be a red view icon
- Tap the red view icon and the seat will be removed from being listed. The customer seat receipt will be printed automatically indicating the seat has been paid and closed
- For displaying the previous closed seats you can select the additional payment options icon
- You will see a new option for showing the seats paid in full to select
- The paid and closed seat will be listed back again on the order ticket. The seat number will have a checkmark on the payment page indicating its been paid
- On the order page the seat will be appended with [PAID] in green text by the seat total amount
Step 5: Tip Prompt Screen
- Turning on the tip prompt screen can be done from the manager gratuity section. Details can be found here Gratuity Screen
- When the gratuity setting is toggled on. Anytime a credit card payment is processed the tip percentages and amounts will be displayed automatically on the device
- The Studio programmed gratuity percentages will be listed as well as custom and no gratuity options
- Customers can enter the tip amount and return the tablet back to the server
- Once the tip amount is entered the credit card receipts will print automatically when on
- Tap close in the top right corner and that will exist the tip screen and navigate back to the payment page
Tip Prompt
Custom Gratuity
Additional Resources and Help!
Still have questions? Please contact us any time at support@ezsoftpos.com.
NOTE: If emailing, please include your business name in the subject line of the email
and provide your preferred contact information for the best response time.
Visit our help center Help Center for more guides and tutorials


