
TABLE OF CONTENTS
- Step 1: Tap To Pay Merchant Settings
- Step 2: Tap To Pay App Setup
- Step 3: Tap To Pay Configuration & Transaction Processing
- Additional Resources and Help!
The Nearpay Tap To Pay integration converts any device with built-in NFC into a standalone contactless payment terminal, eliminating the requirement for external credit card reader hardware
Step 1: Tap To Pay Merchant Settings
- Var Sheet Provisioning: The store specific Var sheet is issued by the backend payment processor and provided to the EZ Software service team to set up the merchant account in Nearpay
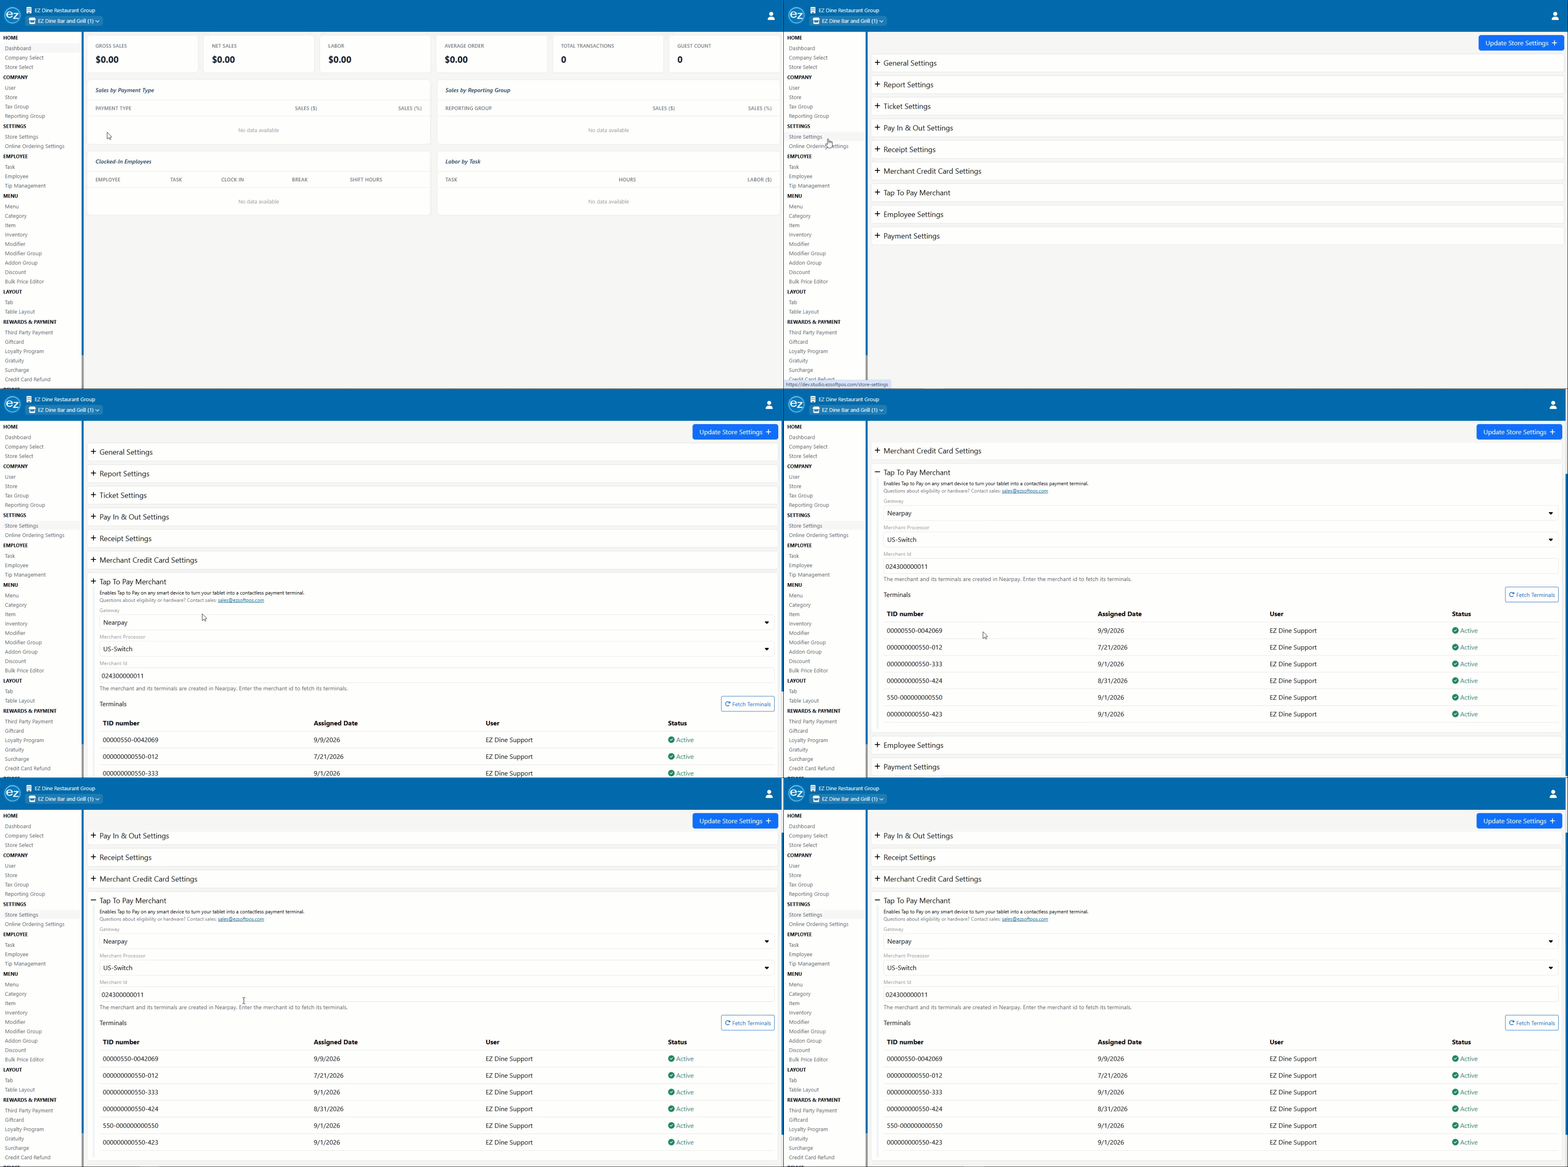
- Studio Setup Access: Once backend account creation is complete, navigate to the Tap To Pay Merchant store settings section in EZ Dine Studio to complete store level configuration
- Merchant Configuration Fields: Expand the Tap To Pay Merchant panel to configure and review the following parameters
- Gateway: The credit card payment gateway (Nearpay) assigned to the store
- Processor: The backend credit card processor pointing directly to the gateway
- Merchant ID (MID): The unique merchant identifier provided on the VAR sheet
- Terminal ID (TID) Details: Displays all payment terminals/devices configured to use Tap To Pay. Each row itemizes the Studio user account assigned to the specific terminal ID
- Assigned Date: The timestamp indicating when the TID was associated to the user
- Status: Current operational state (Active or Inactive)
- Terminal Activation: Once the Tap To Pay Merchant settings are saved in Studio, designated devices can connect to the Tap To Pay app and begin processing contacless transactions directly on the device
Step 2: Tap To Pay App Setup
- Initial Launch & Device Authentication: Locate and open the Tap To Pay app from the Android desktop home screen
- Enter your EZ Dine Studio user credentials (username and password) on the authentication page
- Select your store location to display the list of available Terminal IDs (TIDS)
- Select the target Terminal ID to complete device assignment. Note: Once assigned, a Terminal ID locks exclusively to that physical device and cannot be assigned to any other devices
- Upon successful authentication, the Tap To Pay app header displays active assignment details
- Top-Left Corner: Assigned Store Name and Terminal ID
- Top-Right Corner: Assigned User Account
- Background Operation & Transaction Capture: Tap the Minimize/Close option after setup. The Tap To Pay app must run continuously in the background to capture and process payments sent from the EZ Dine app
- Independent Operation: Each Tap To Pay device operates independently, capturing and recording transactions for its specific assigned terminal ID
- Batch Capture Timing: Transaction capture follows the same store Credit Card Capture Time setup in Studio
Step 3: Tap To Pay Configuration & Transaction Processing
Tap To Pay does not support Credit Card Tabs due to pre-authorization constraints (Credit Card Tab functionality disables automatically when using Tap To Pay). Transactions are captured immediately after finalization. Transaction history tip adjustments or reopening orders are not supported. Use the Studio Refund feature for any post settlement adjustments
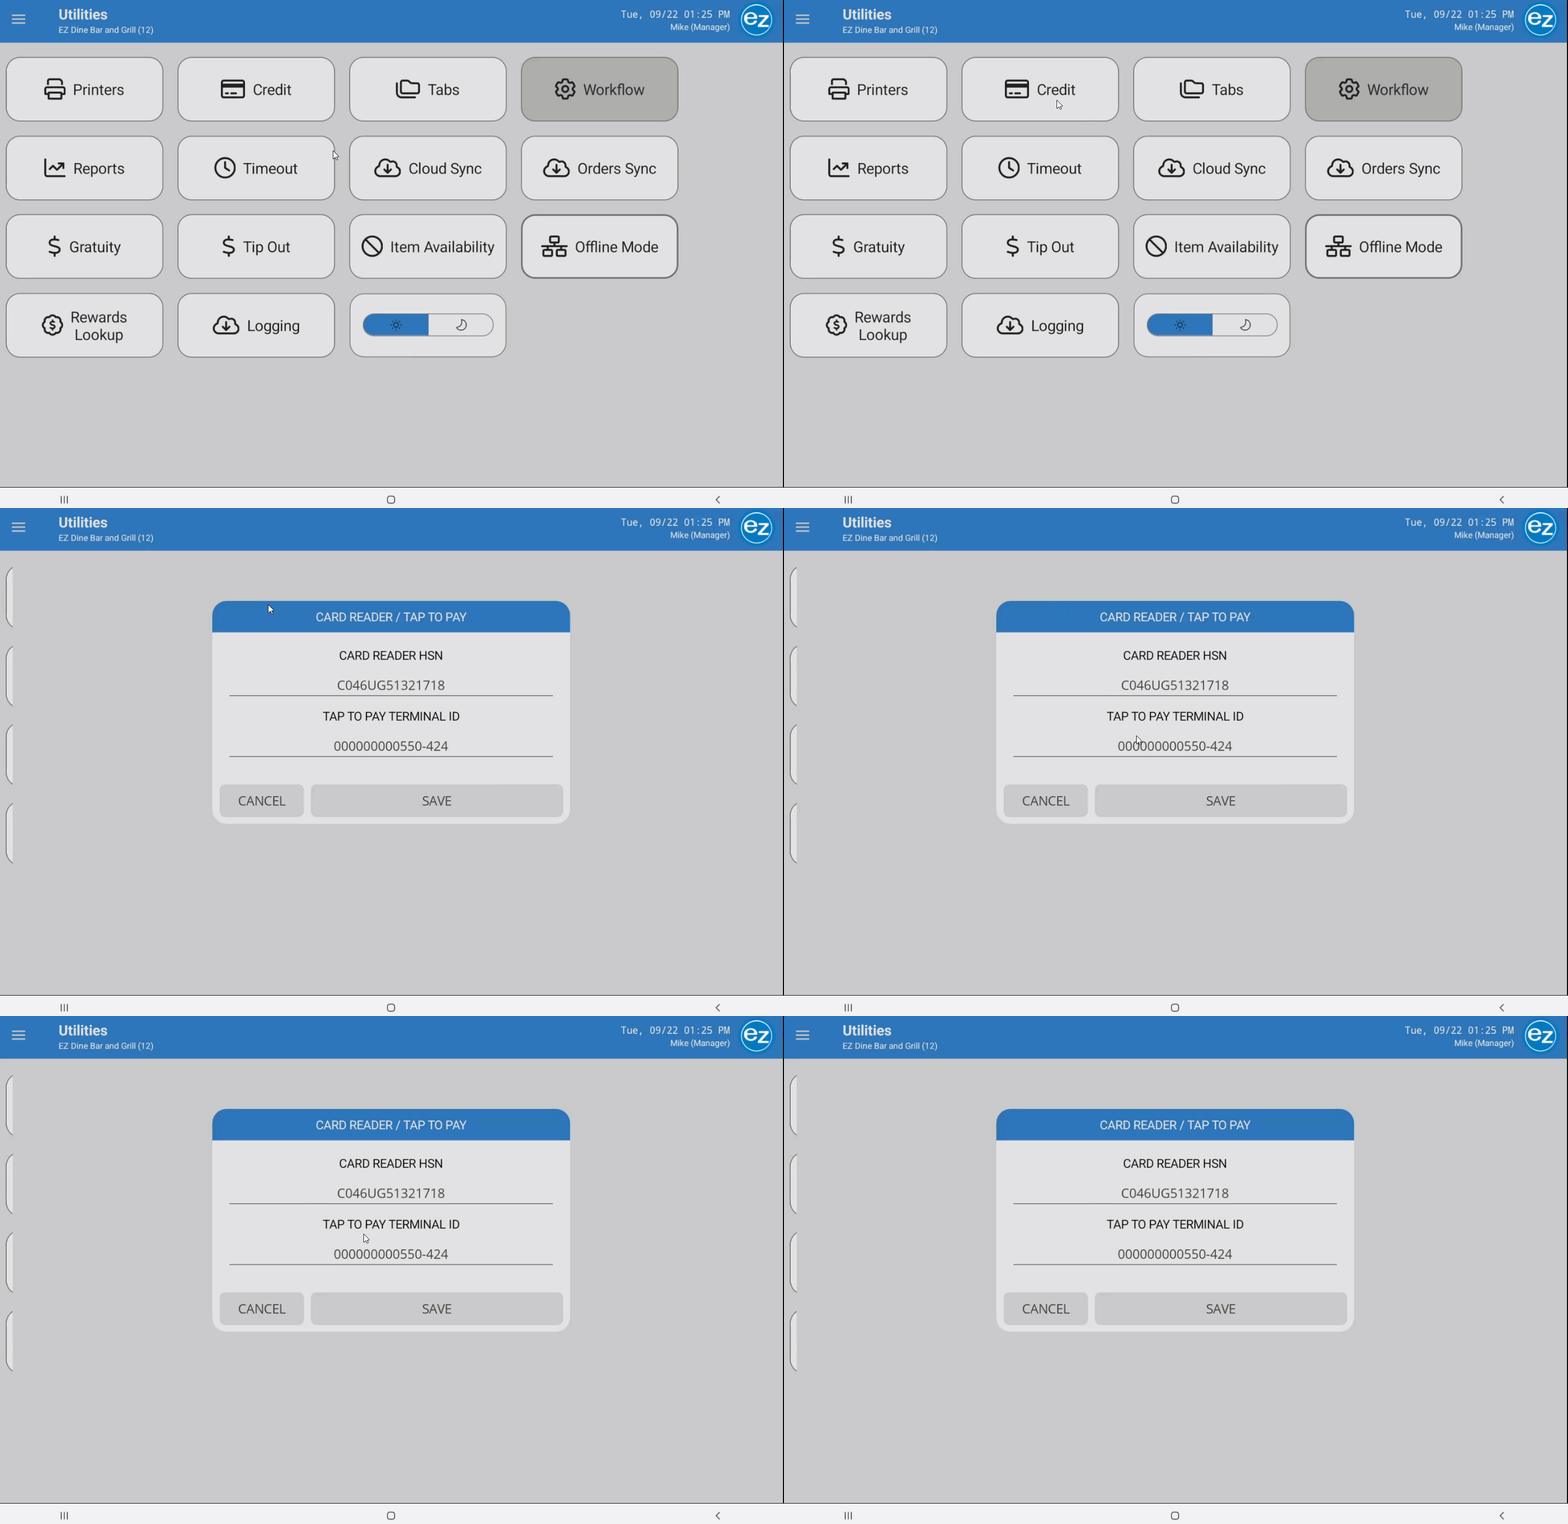
- Manager Utilities: In the EZ Dine app, navigate to Manager Utilities<Card Reader
- Locate the Tap To Pay Terminal ID section
- Enter the assigned Terminal ID number matching the device assignment from the Tap To Pay app and Save
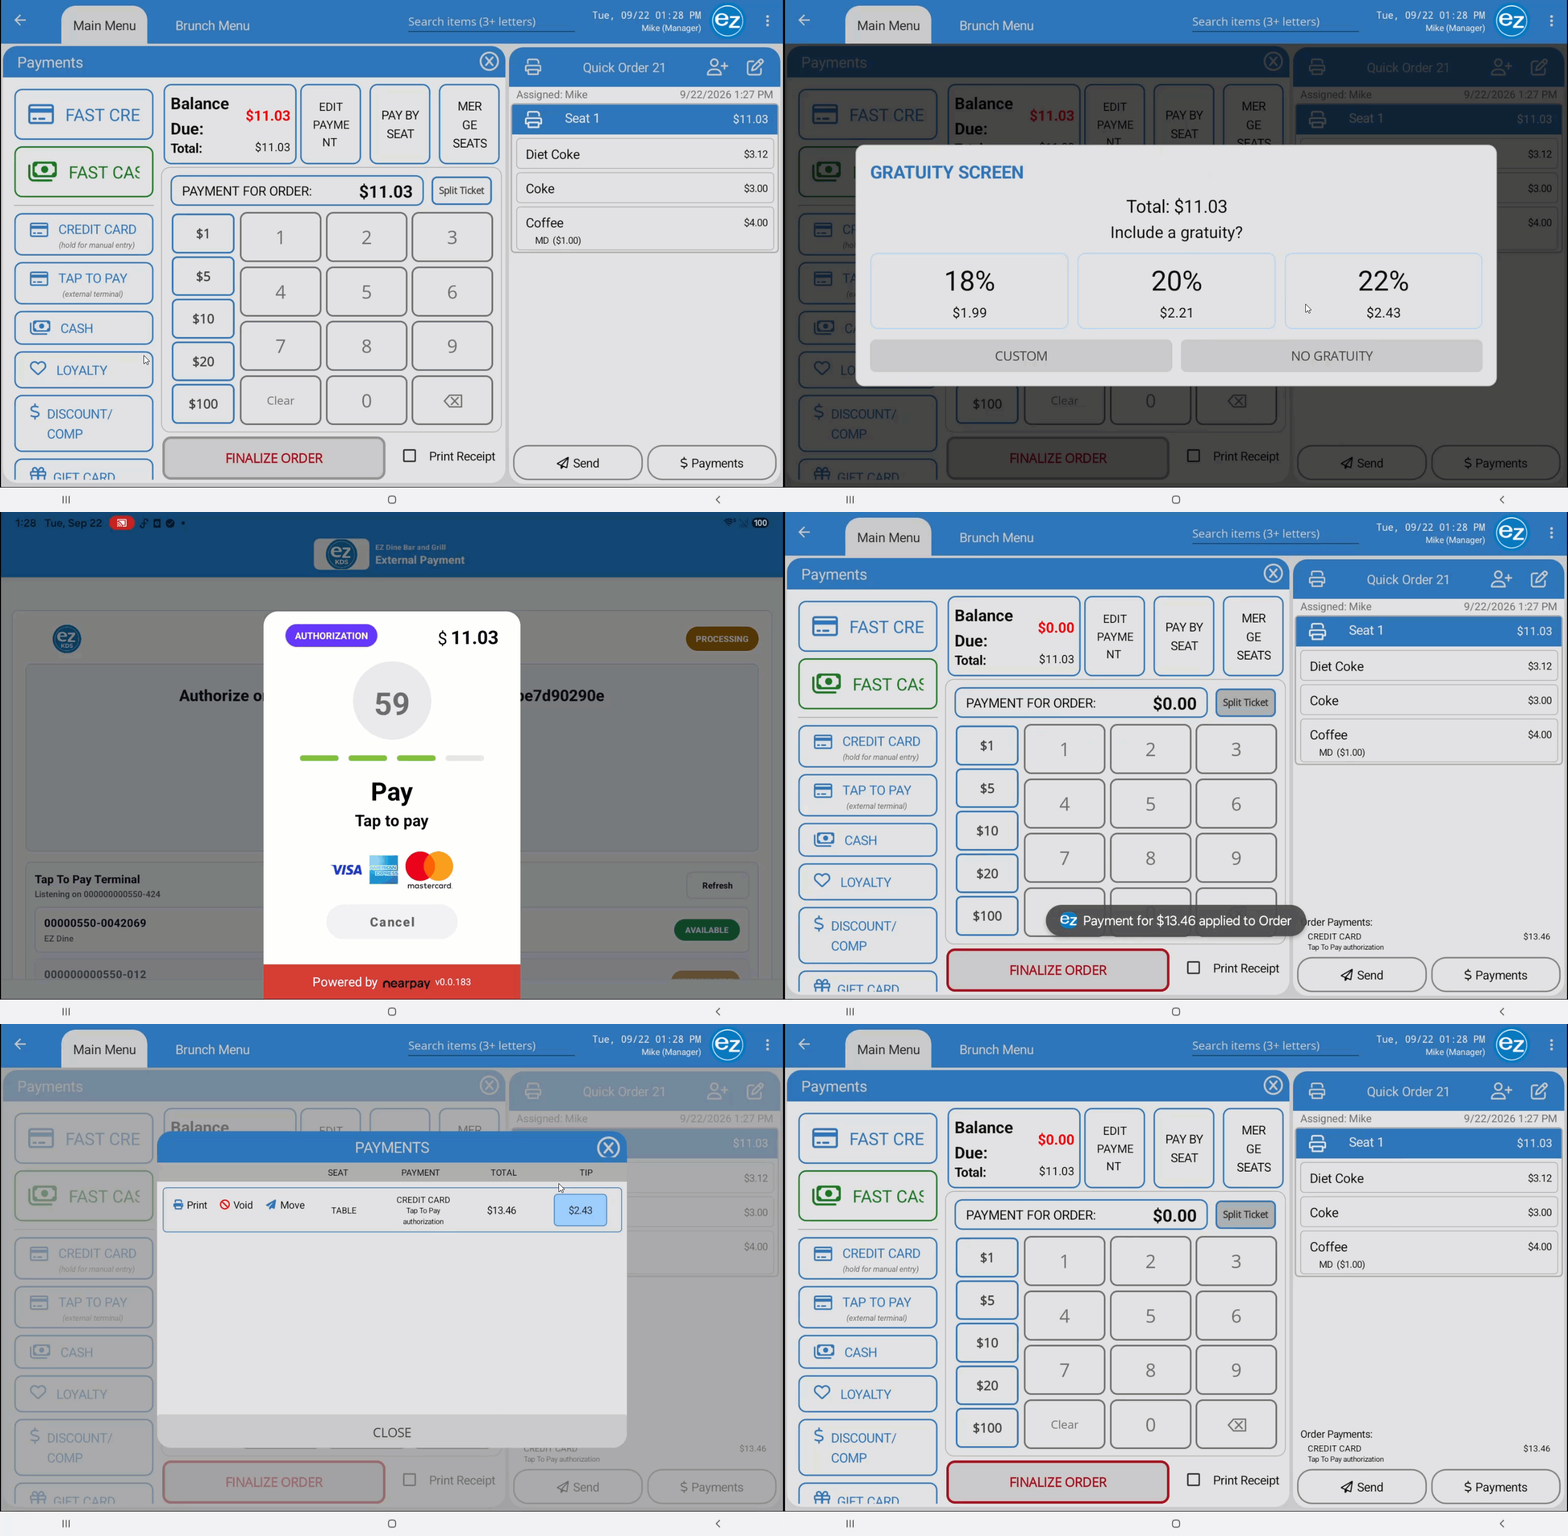
- Processing Tap To Pay Transactions: Navigate to the order payment screen
- Select the Tap To Pay payment button located directly beneath the standard Credit Card option
- Select or enter the desired gratuity on the tip screen. The EZ Dine app will initialize the Tap to Pay terminal session
- Instruct the customer to tap or hold their contactless card or NFC mobile device against the right side of the tablet near the camera lens (the location of the tablet's built-in NFC reader)
- The tablet vibrates during the scan process to indicate the NFC chip is reading
- Verification: Upon successful authorization, a "Payment Successful" pop-up displays with the processed dollar amount
- Tap the Back Arrow in the top-left corner to exist back to the employee login screen, unlock the device, and verify the transaction on the payment page
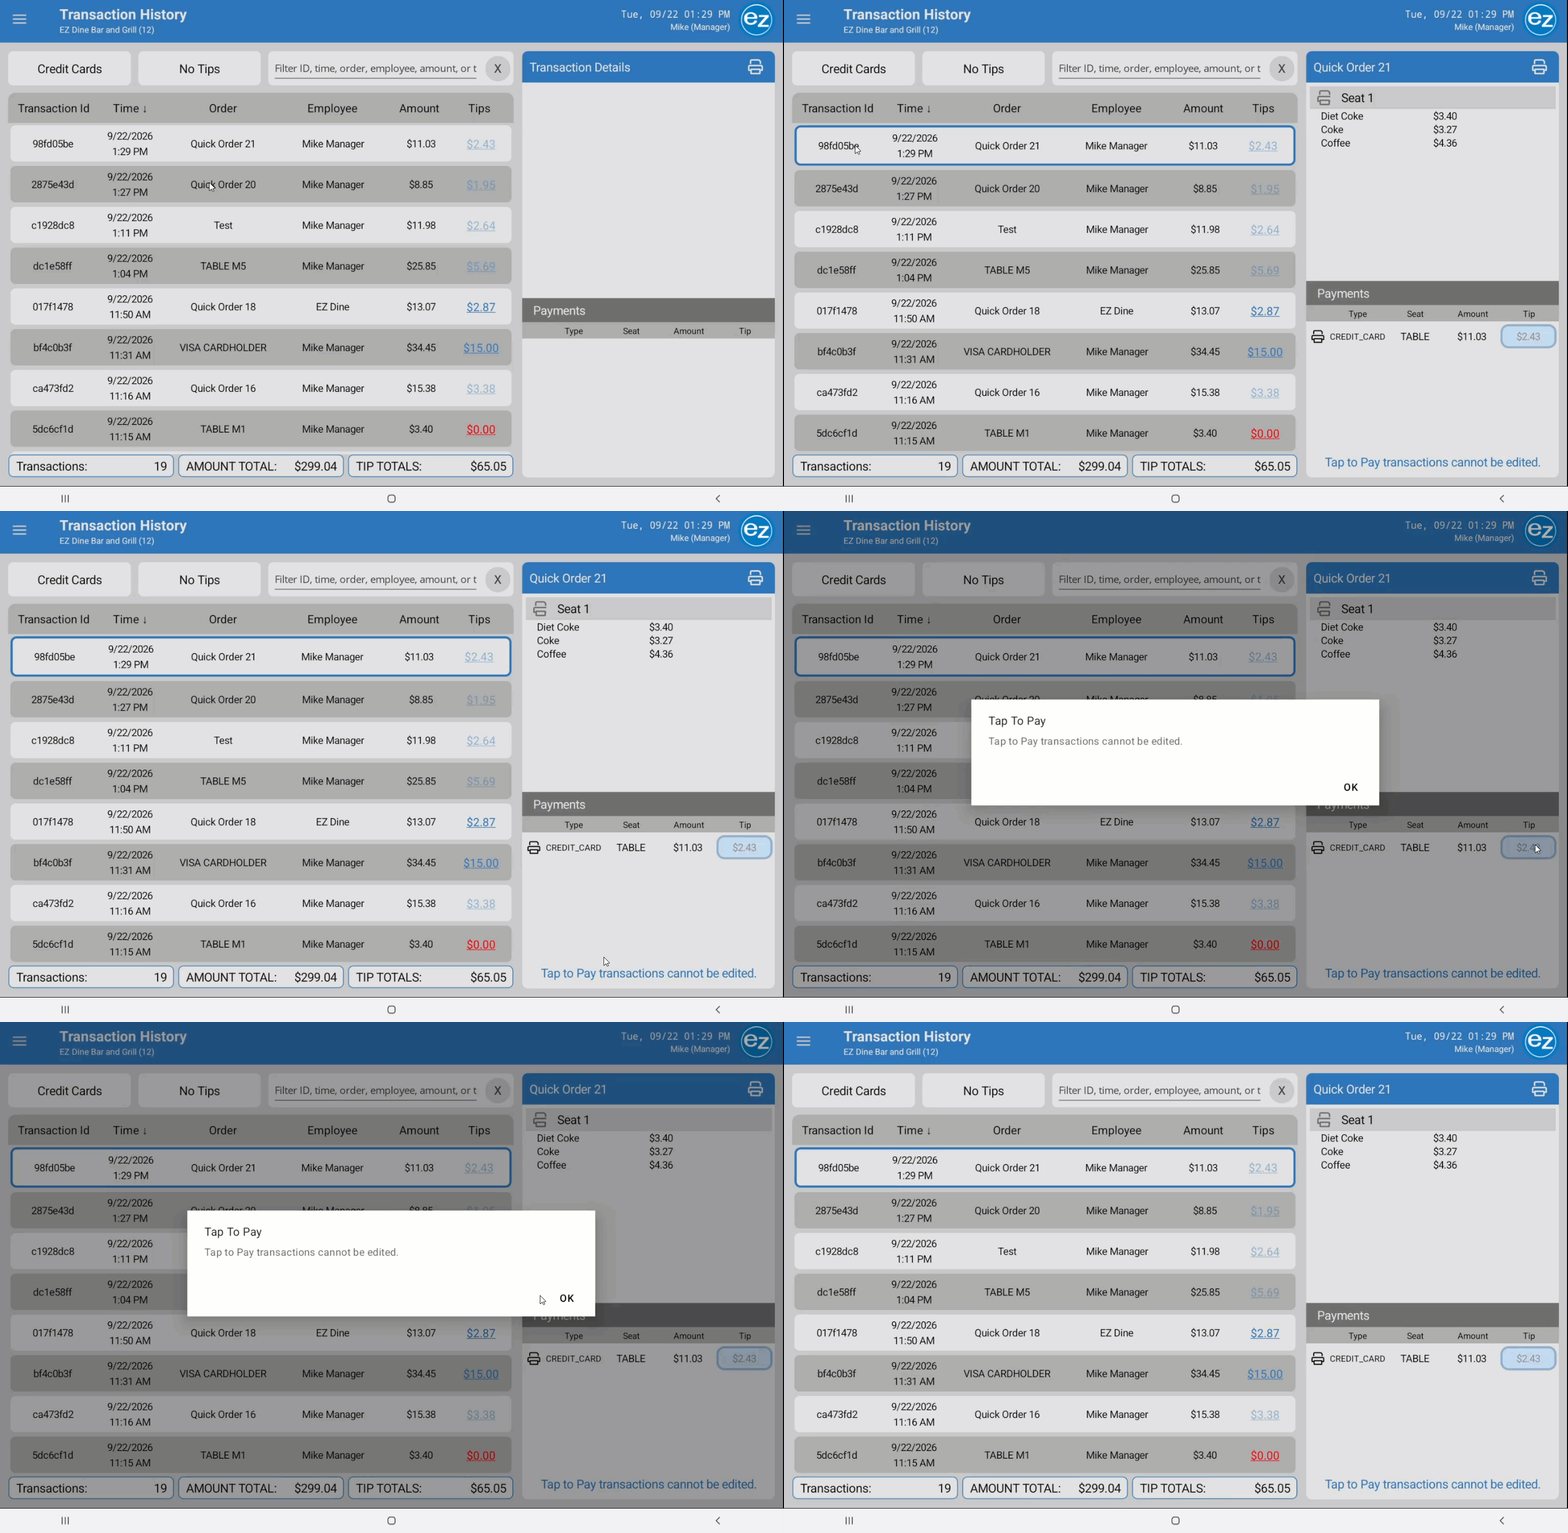
- Instant Transaction Capture: Tap To Pay transactions process and capture funds directly at the moment of finalization
- Editing Restrictions: Once finalized, the transaction record cannot be modified, edited, or reopend
- Reopen Order Disabled: The Reopen Order option is automatically hidden from the ticket control menu
- Tip Field: The Tip field is grayed out. Tapping or selecting the tip field displays a warning message
- Payment Details Notice: A permanent status banner displays at the bottom of the transaction payment detail section stating that Tap To Pay transactions cannot be edited
- Handling Adjustments: If a customer requires an adjustment after finalization, perform a standard Refund through EZ Dine Studio
Tap To Pay Terminal ID
Processing Tap to Pay
Tap To Pay Transaction History
Additional Resources and Help!
Still have questions? Please contact us any time at support@ezsoftpos.com.
NOTE: If emailing, please include your business name in the subject line of the email
and provide your preferred contact information for the best response time.
Visit our help center Help Center for more guides and tutorials